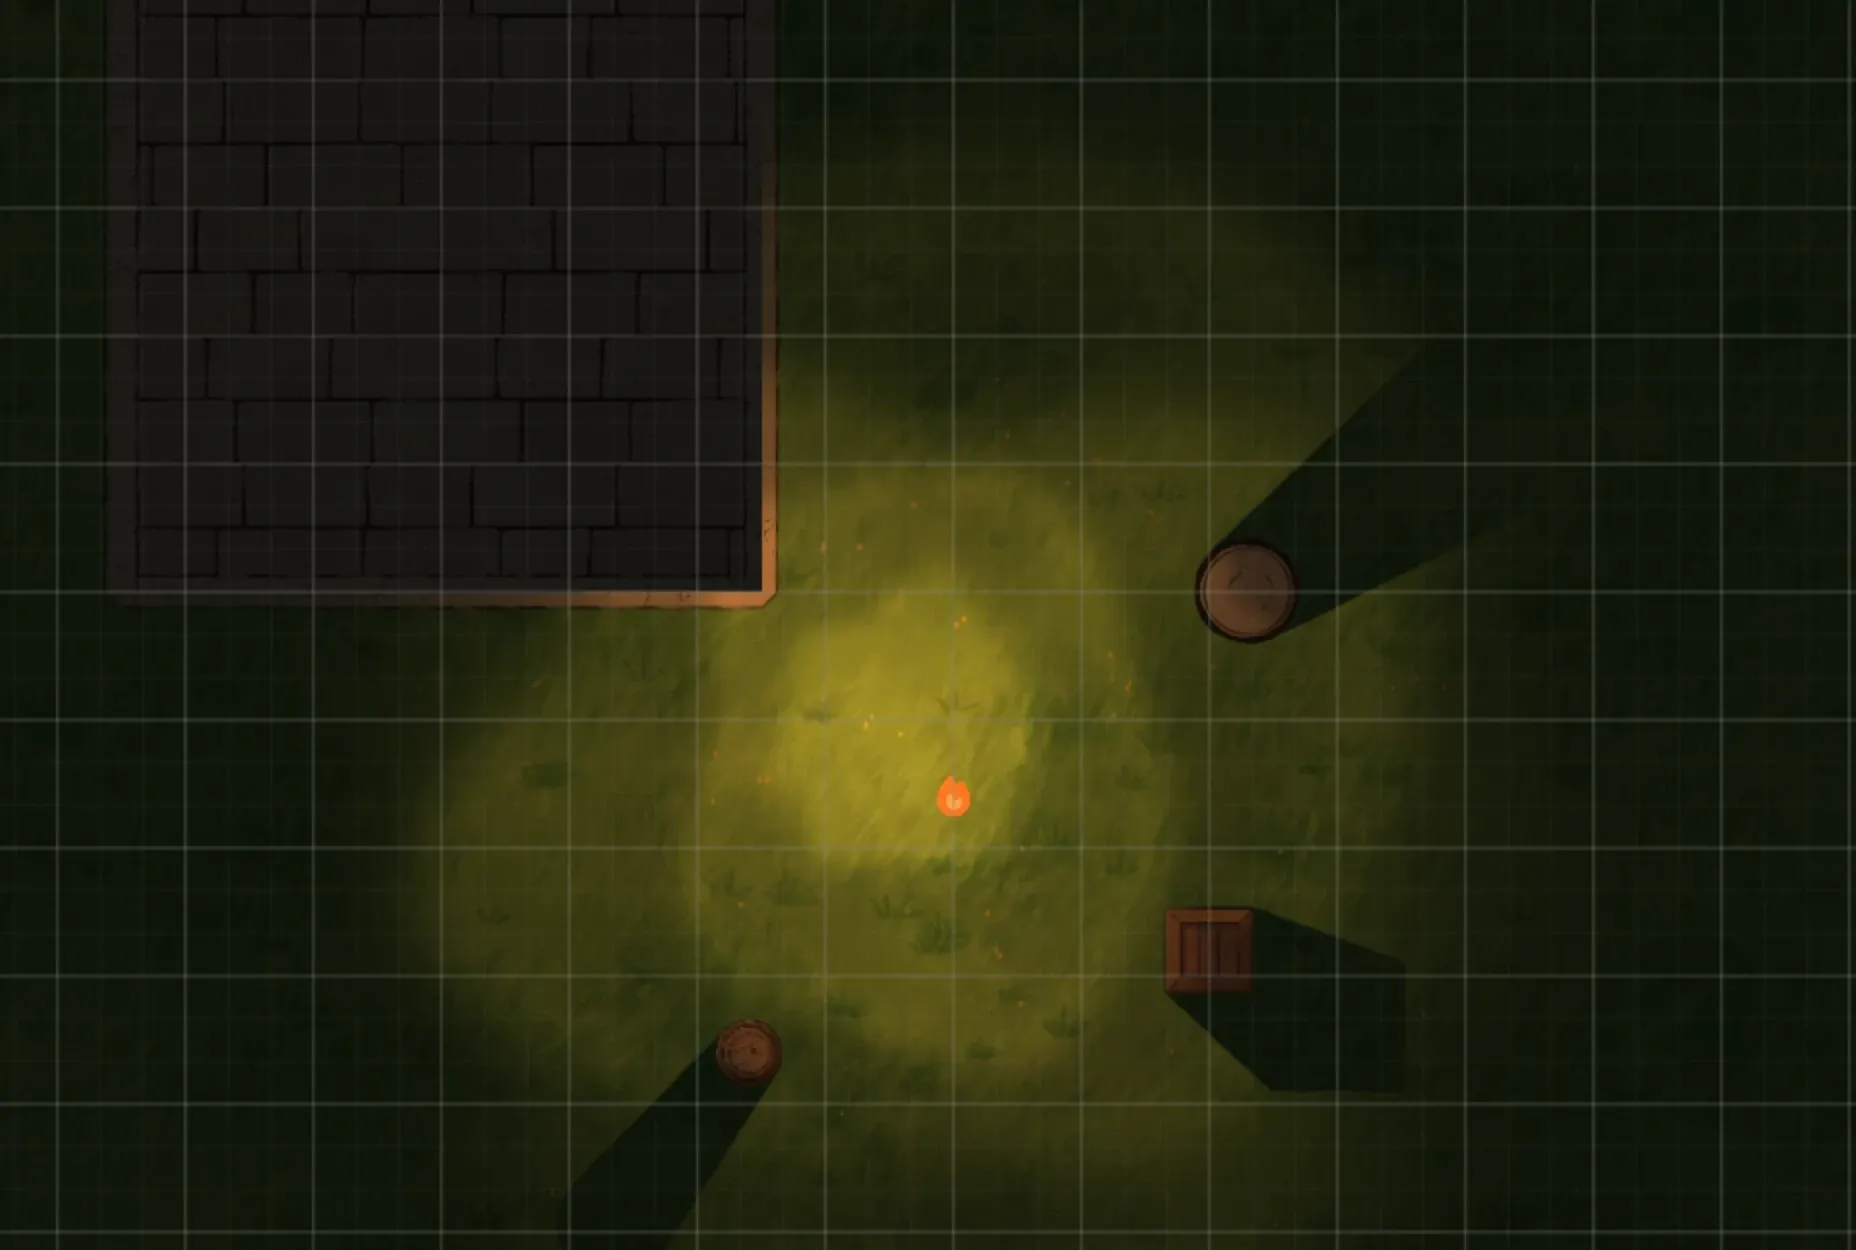
Lighting is going to be a huge topic, as it spans directional, ambient, accent and effect lighting.
We’re going to start with what people think of when they talk about battlemap lights (and arguably the most flashy), which is directional lighting.
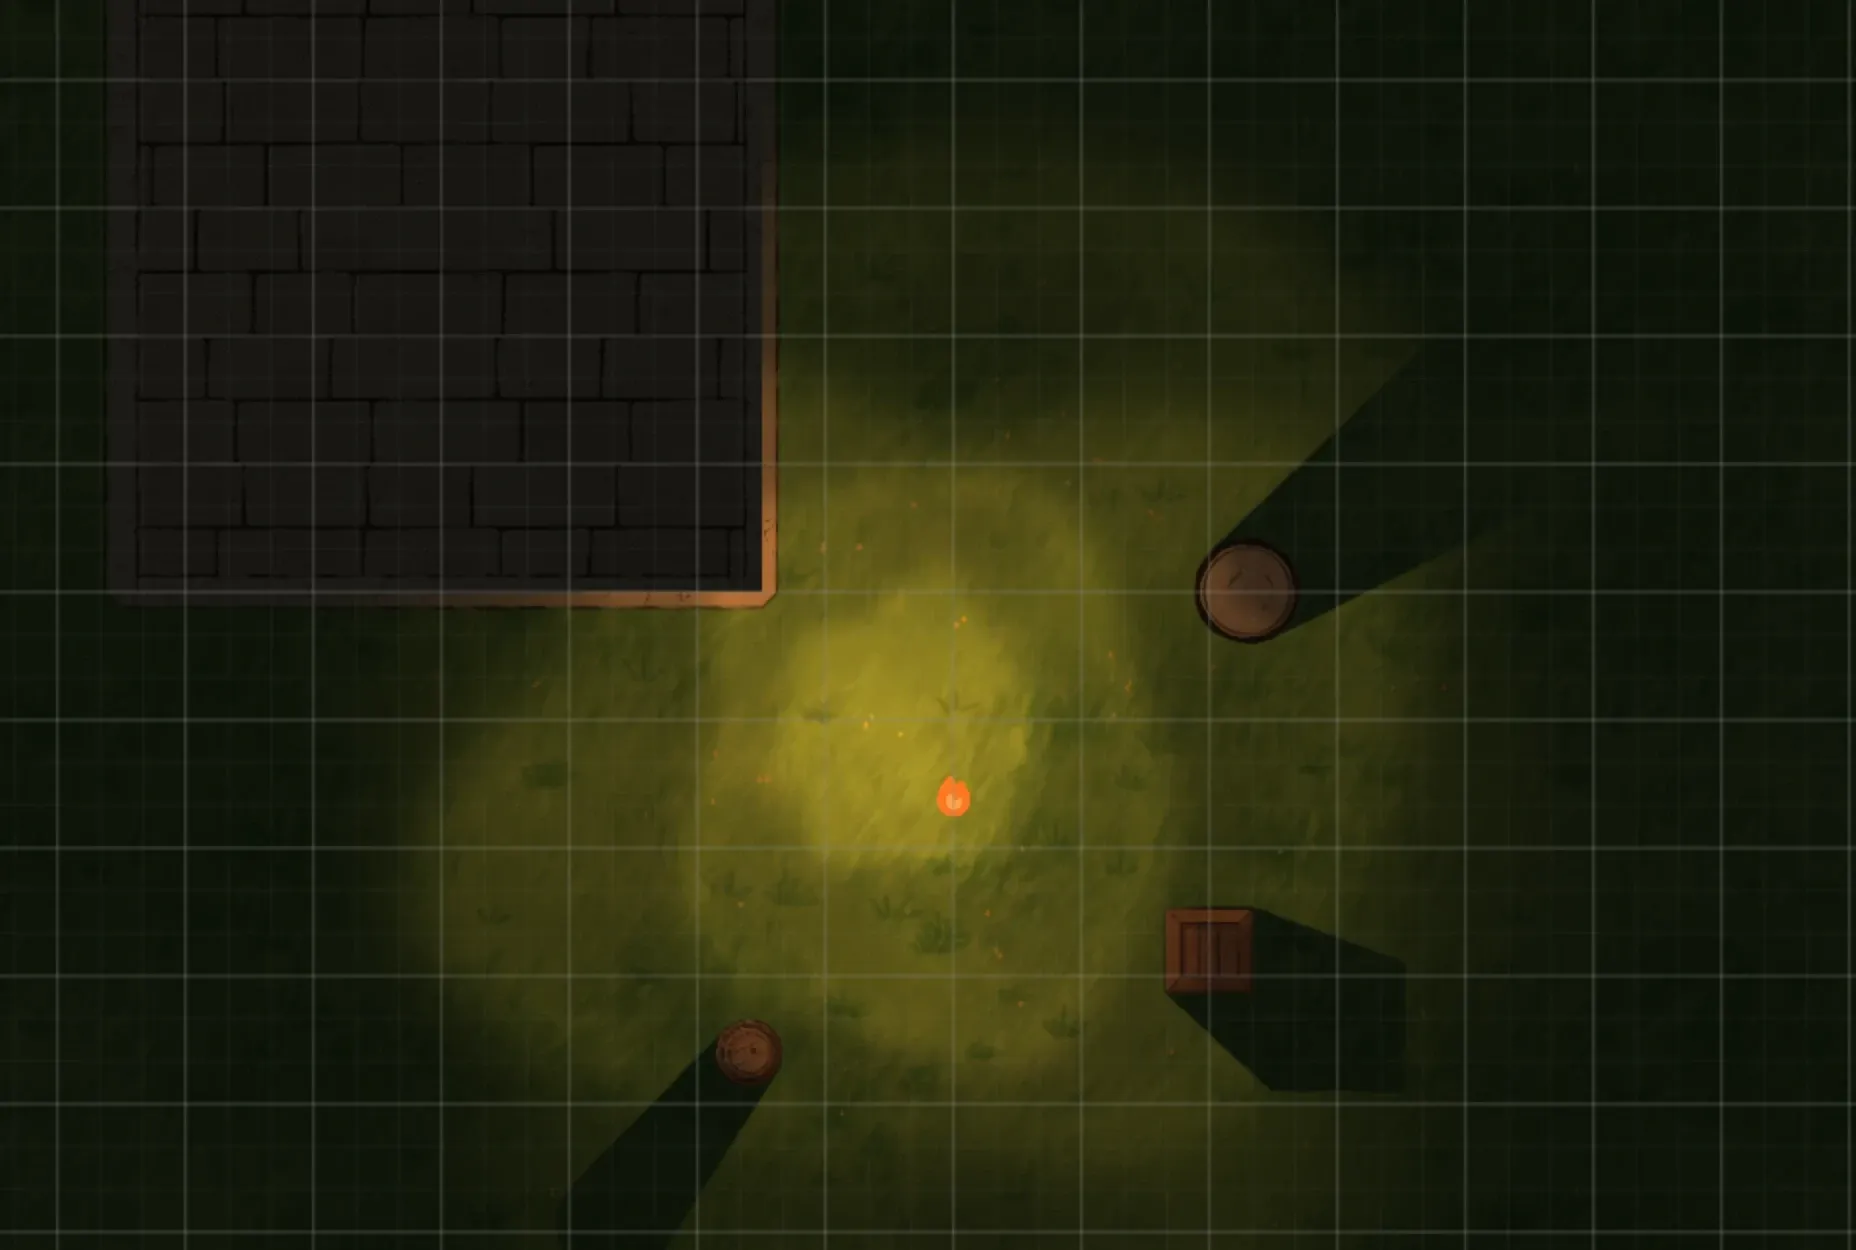
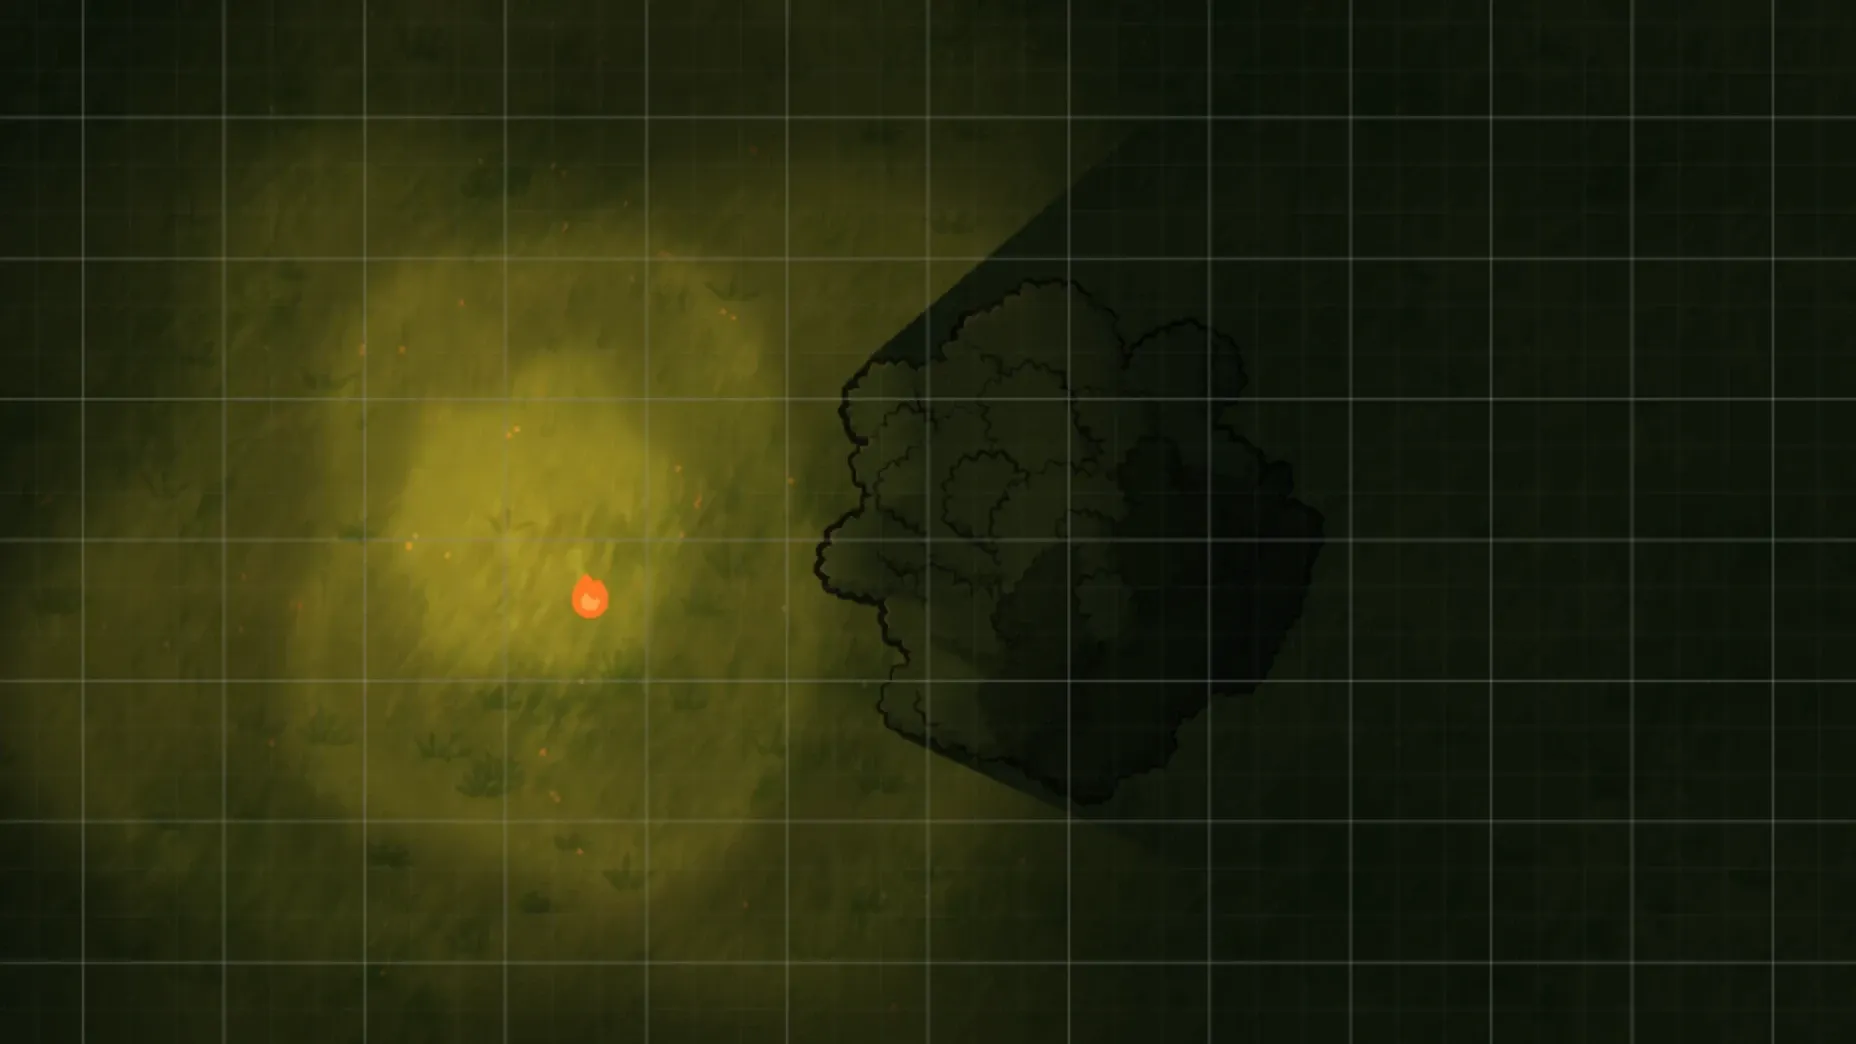
Directional lighting is processed through a raycasting algorithm, and it was one of the first tests that I did with PixiJS way back in the day, just to make sure it was even possible.
Raycasting is also how VTTs like Foundry and games like Monaco & MegaMek handle line of sight.
As magical as it looks when an object is casting shadows, it’s actually pretty straightforward.
So, imagine that you’re standing in a dark room with a lantern (hey! just like your intrepid PC!). Light is spreading out in every direction, and it keeps going in a straight line until it hits something. Everything before it hits something is (as the kids say) lit. Everything behind it doesn’t get any light — which means shadow.
With raycasting, we’re simulating that with code.
In code, a ray is just a starting point (the light) and a direction that it’s moving in. The wall is a line segment between two points. So we use some high school algebra and find where the two lines intersect. If the ray crosses multiple walls, then we just keep the closest hit and throw away everything else. Light doesn’t get a second chance after it gets blocked.
If we do that in a full circle around the light, we get a ring of hit points. Once we connect those dots we have a polygon describing everywhere the light can reach. Anything on the outside of that is shadow.
The catch is deciding which direction to shoot. A ray every few degrees will tell you what’s in the way, but it almost never lands exactly on a corner, so we do a second pass aimed right at the corners of whatever we hit, and that’s where the crisp shadow edges come from.
Where it gets funky is HOW it interacts with objects.
How BlocksLight works
Just like everything else in ArtifaxStudio, lights are Layers. This is important because the only thing that makes a Light layer different from any other object, is that it has a EmitsLight flag set to true.
Lights then create a circle of color + alpha that expands outwards until it hits the edge of the circle, at which point it stops.
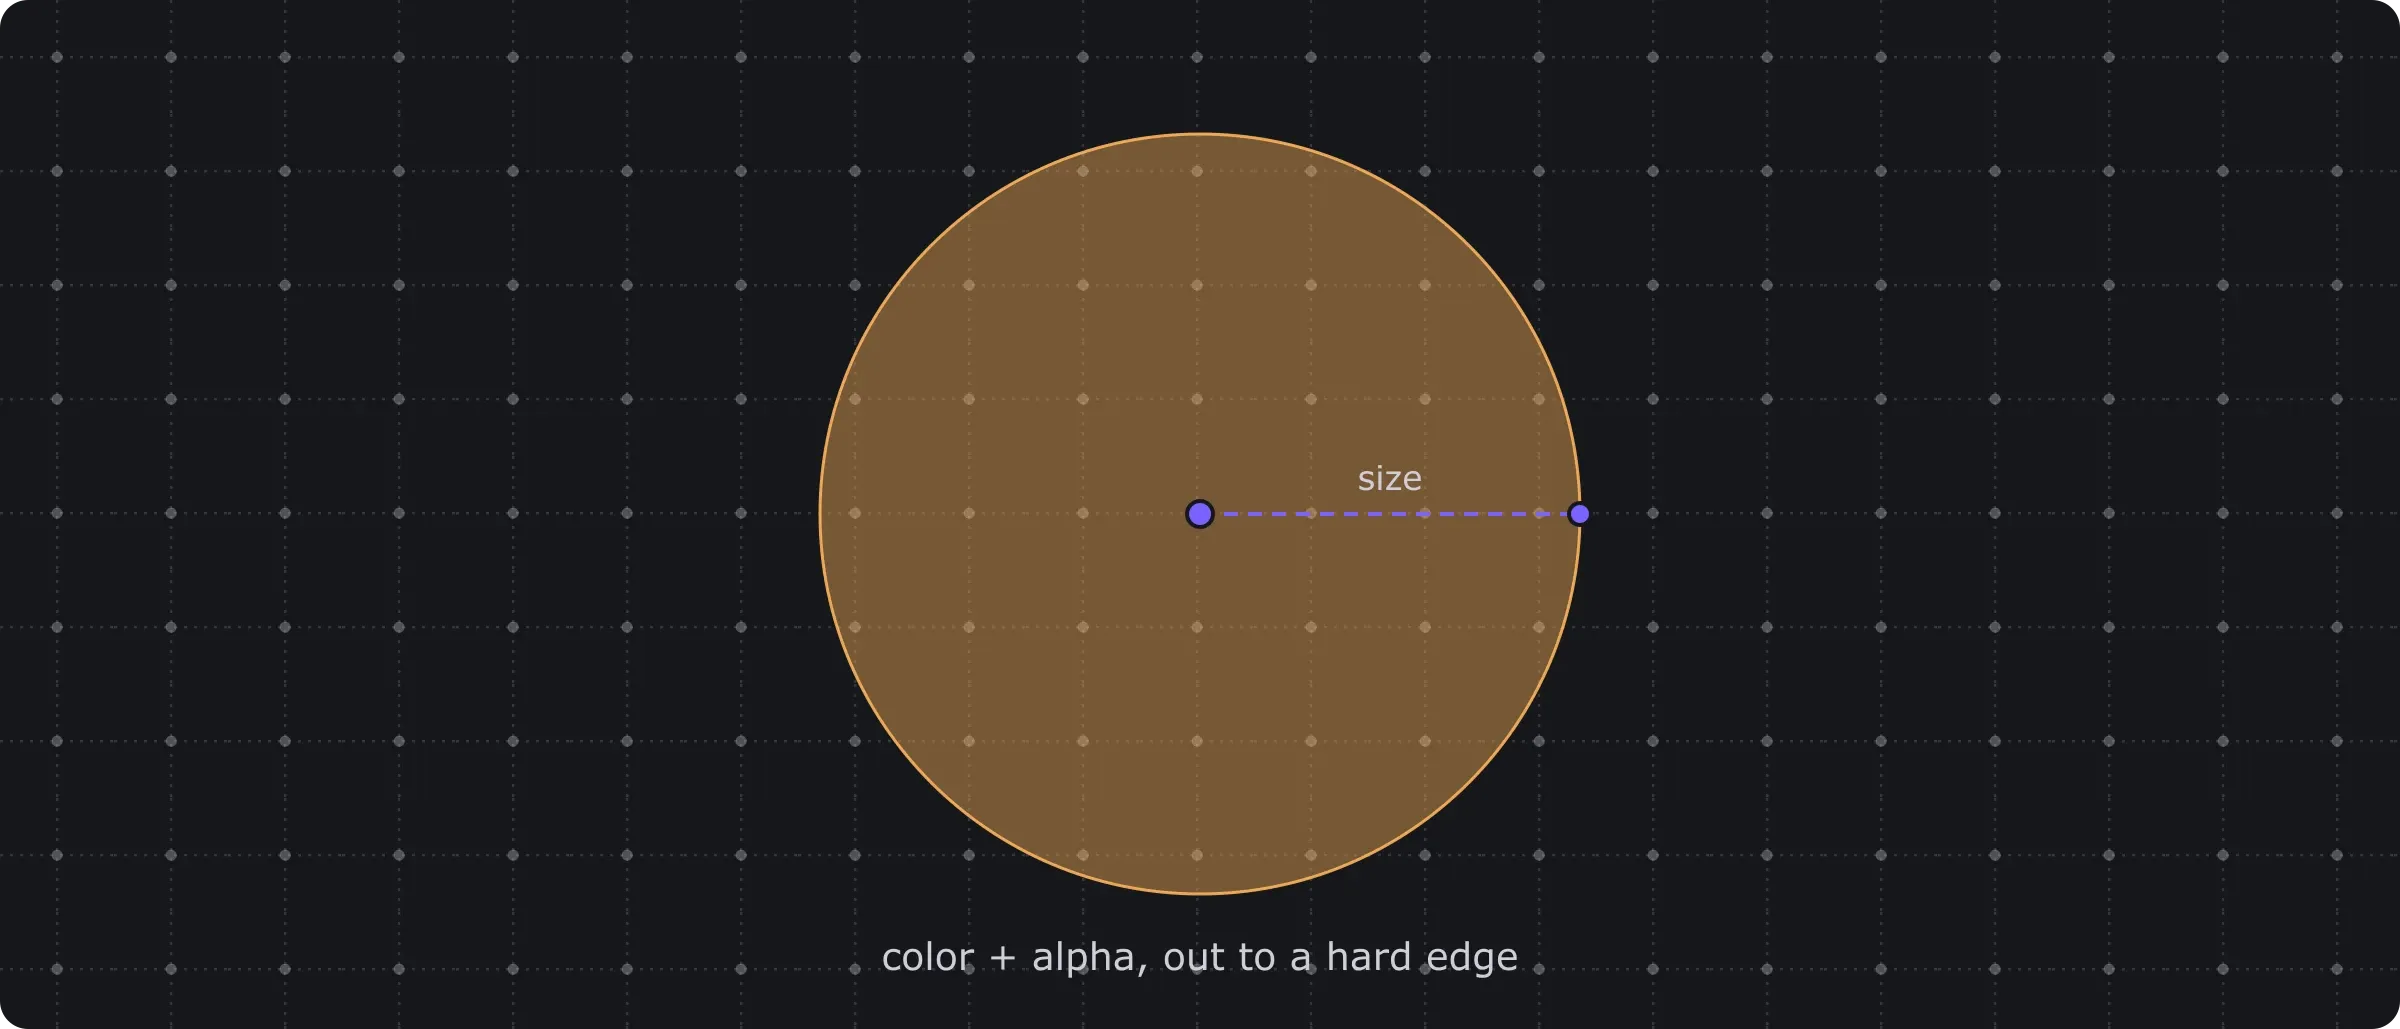
But, a flat circle of color doesn’t look like a light, so we apply a custom LuminanceAlpha Filter which lets an arbitrary black-background PNG work as a light without a hard edge.
That lets us create different light shapes to be used in different situations, as well as allows us to have standard objects (like torches) emit light as well.
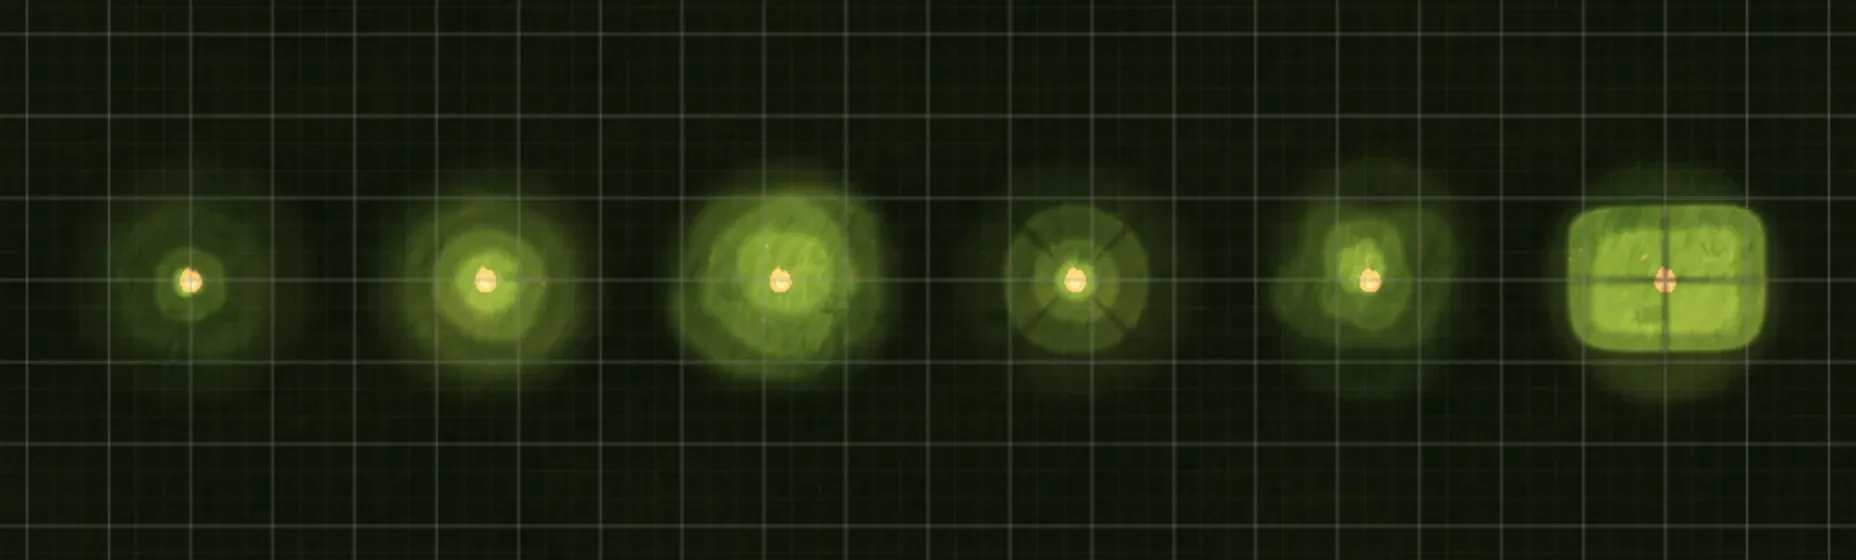
So, now we have light! How do we make shadow?
We apply shadows to any layers in the current layer group that has the blocks_light setting turned on. That means solid walls, statues, people, cards, etc can all be set to block light.
We then shoot out our first pass of rays at 15° angles, and detect anything within the light range that it might hit. If we hit something, we then calculate out the shape of the shadow and then apply that directly to the light itself.
Works great!
But wait! Walls are geometry, and that’s easy, but what about the Props? Props are Sprites in PixiJS, and Sprites just have bounding boxes. How are we having the light wrap around the PNG so cleanly?
Getting the light for assets
We talked about how every layer has both a bounding box as well as a path. Textures (and especially Props) are a strange one, as while they have a visible path (what we can see with our eyes), as far as PixiJS is concerned, they only have the bounding box.
So how do we do this?
While it’s computationally straightforward, good lighting is really the wow factor that makes a map come alive. Just like good lighting is what makes or breaks CGI, it’s the same with maps.
I was worried that with 1000s of sprites on the screen at once, and having to calculate each of the sprite outlines for each unique sprite that the calculations would make the app chug. But with some smart calculations and really good caching, it wasn’t as computationally hard as I thought it was going to be.
Essentially what we’re doing is getting the alpha channel straight off the GPU from PixiJS’s extract method, render it, and use a Marching Squares algorithm to calculate the exact outline of the image.
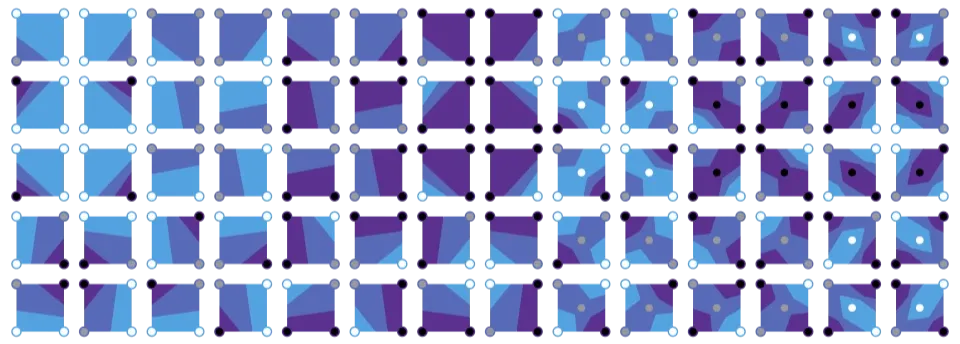
Marching squares is a computer graphics algorithm that generates contours for a two-dimensional scalar field (rectangular array of individual numerical values).
Then, because we don’t want to re-calculate that border every time we rotate or resize the sprite, we cache the 0,0 border, and then apply the transform of the Sprite to the path, which makes re-calculating the light super fast, even when moving and rotating lots of objects simultaneously.
💡 If you want to play with this yourself, Nicky Case’s Sight & Light and Red Blob Games’ 2D Visibility are the two best interactive explainers out there.
And that’s how directional light works. Drop a light, drop an item with blocks_light on, and the shadows just work without any crazy magic or having to trace walls around every tree on the map.
But directional blocks_light is only one type of lighting that we want to work with. The other is casts_shadow, which is creates softer, less harsh shadows from ambient light. This is the default for most physical objects, and exists so that you get nice directional shadows in outdoor light where everything flows in the right direction. It would be really weird if the sun gave super-strong directional light.
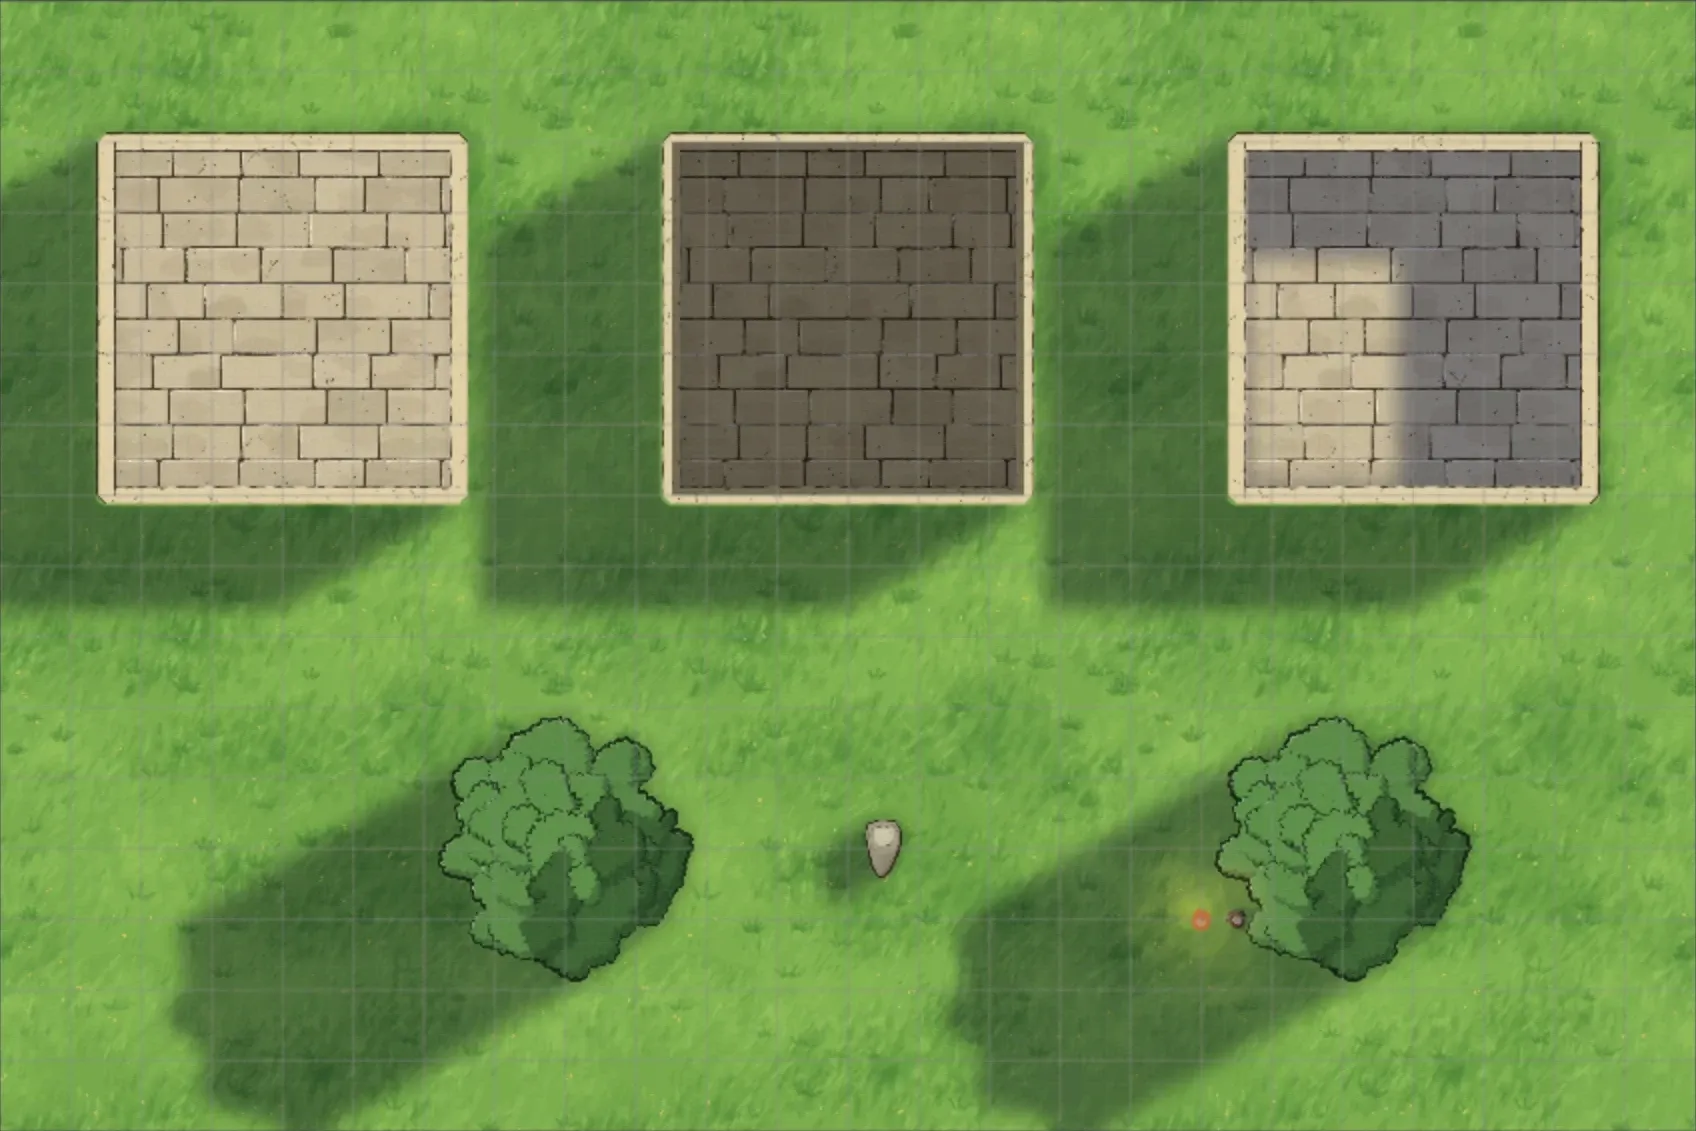
That will get fully implemented when we build out the ambient light system. Like I said, lighting is a huge topic.
See you on the flip side.
Taggedlightingraycastingshadowspixijs