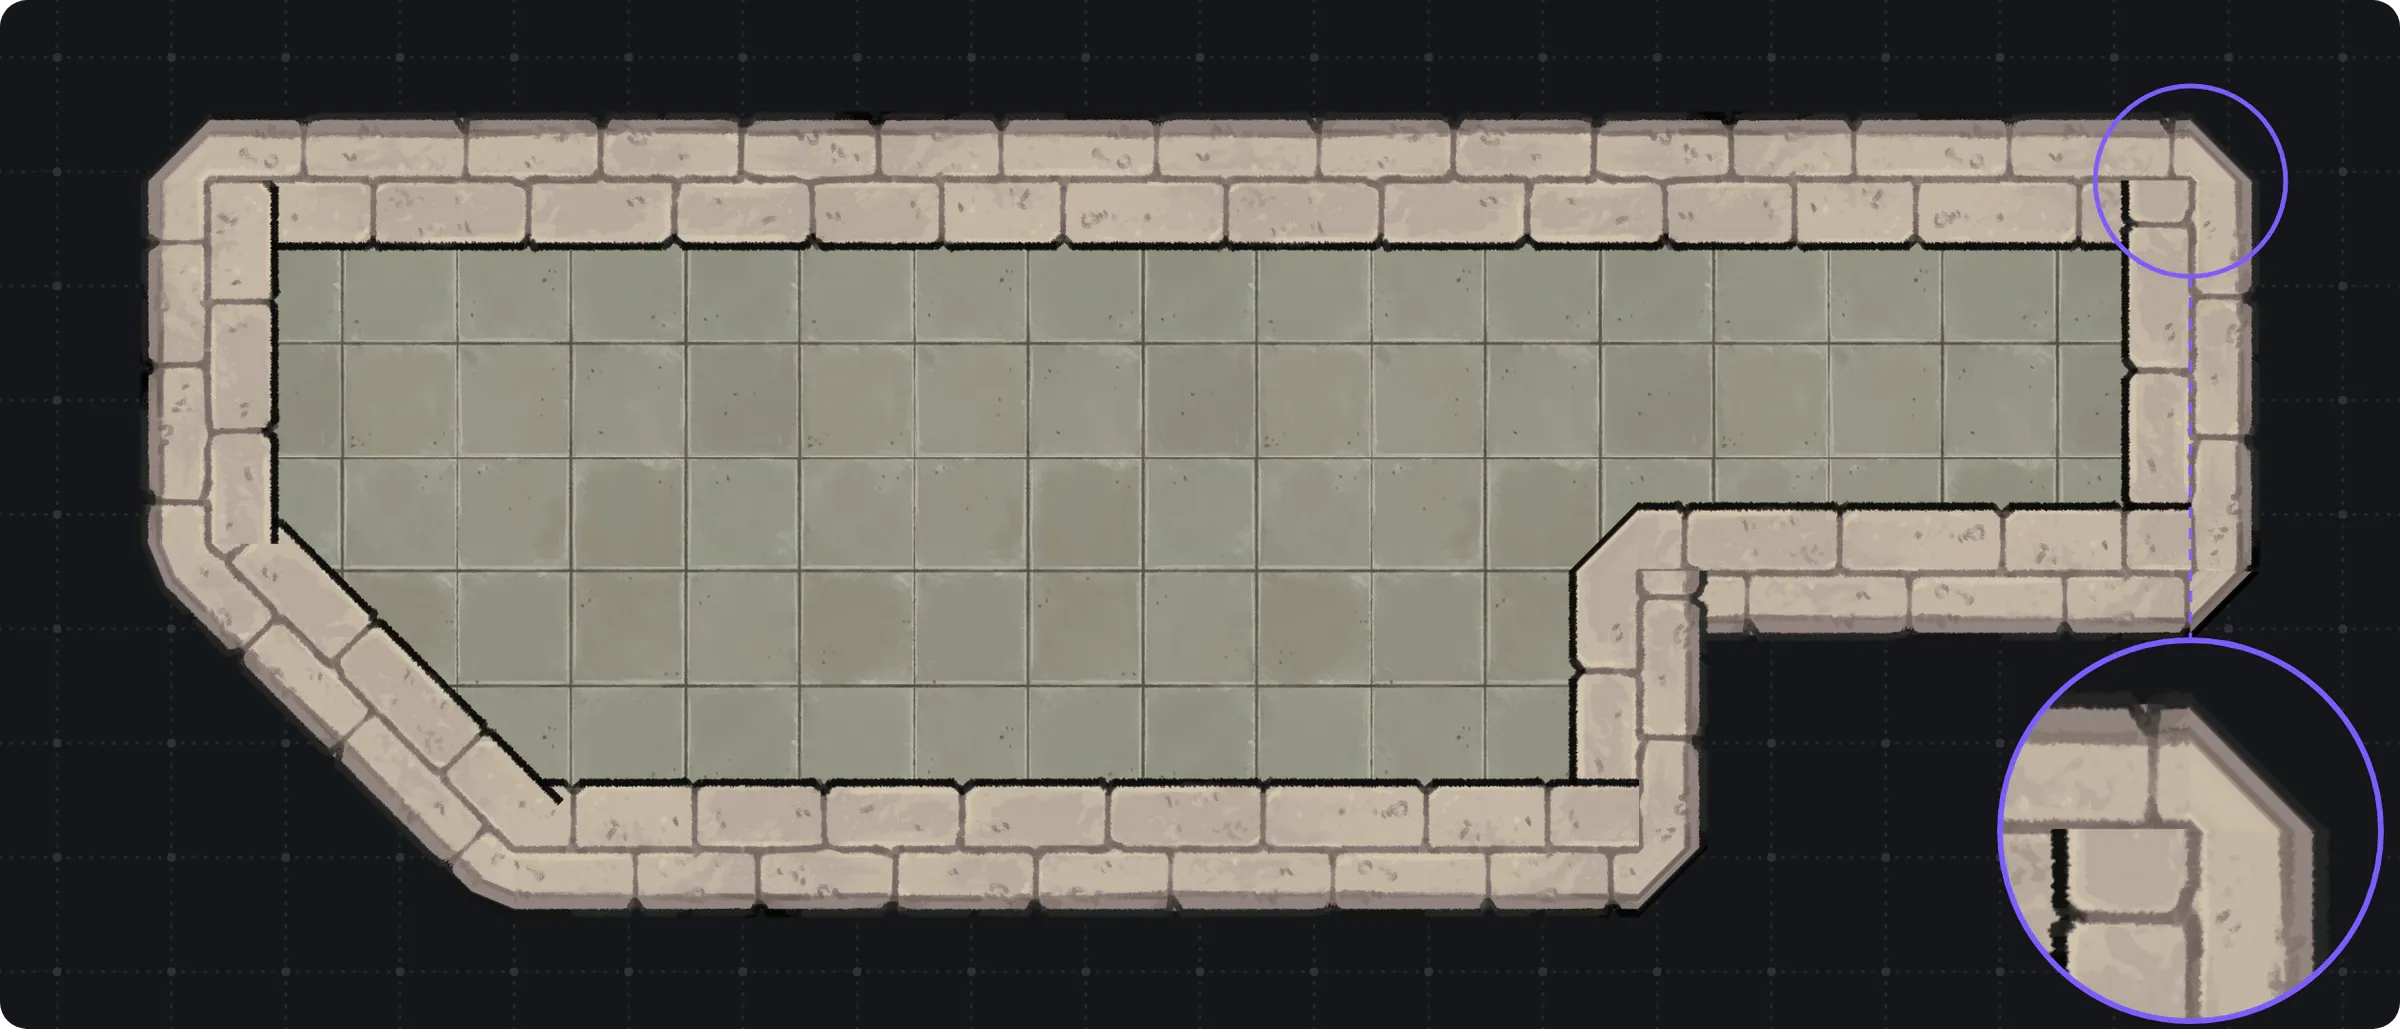
I’ll be honest, I couldn’t think of a funny thing to say about corners. By this point you should know what you’re in for when reading these.
There are many times when something that is so obvious in the real world becomes insurmountably difficult when translating it to 2d or illustration.
Today I want to talk about corners.
Corners are interesting, for a number of reasons, but the most fascinating to me is that there really isn’t a concept of a “circle” in computers.
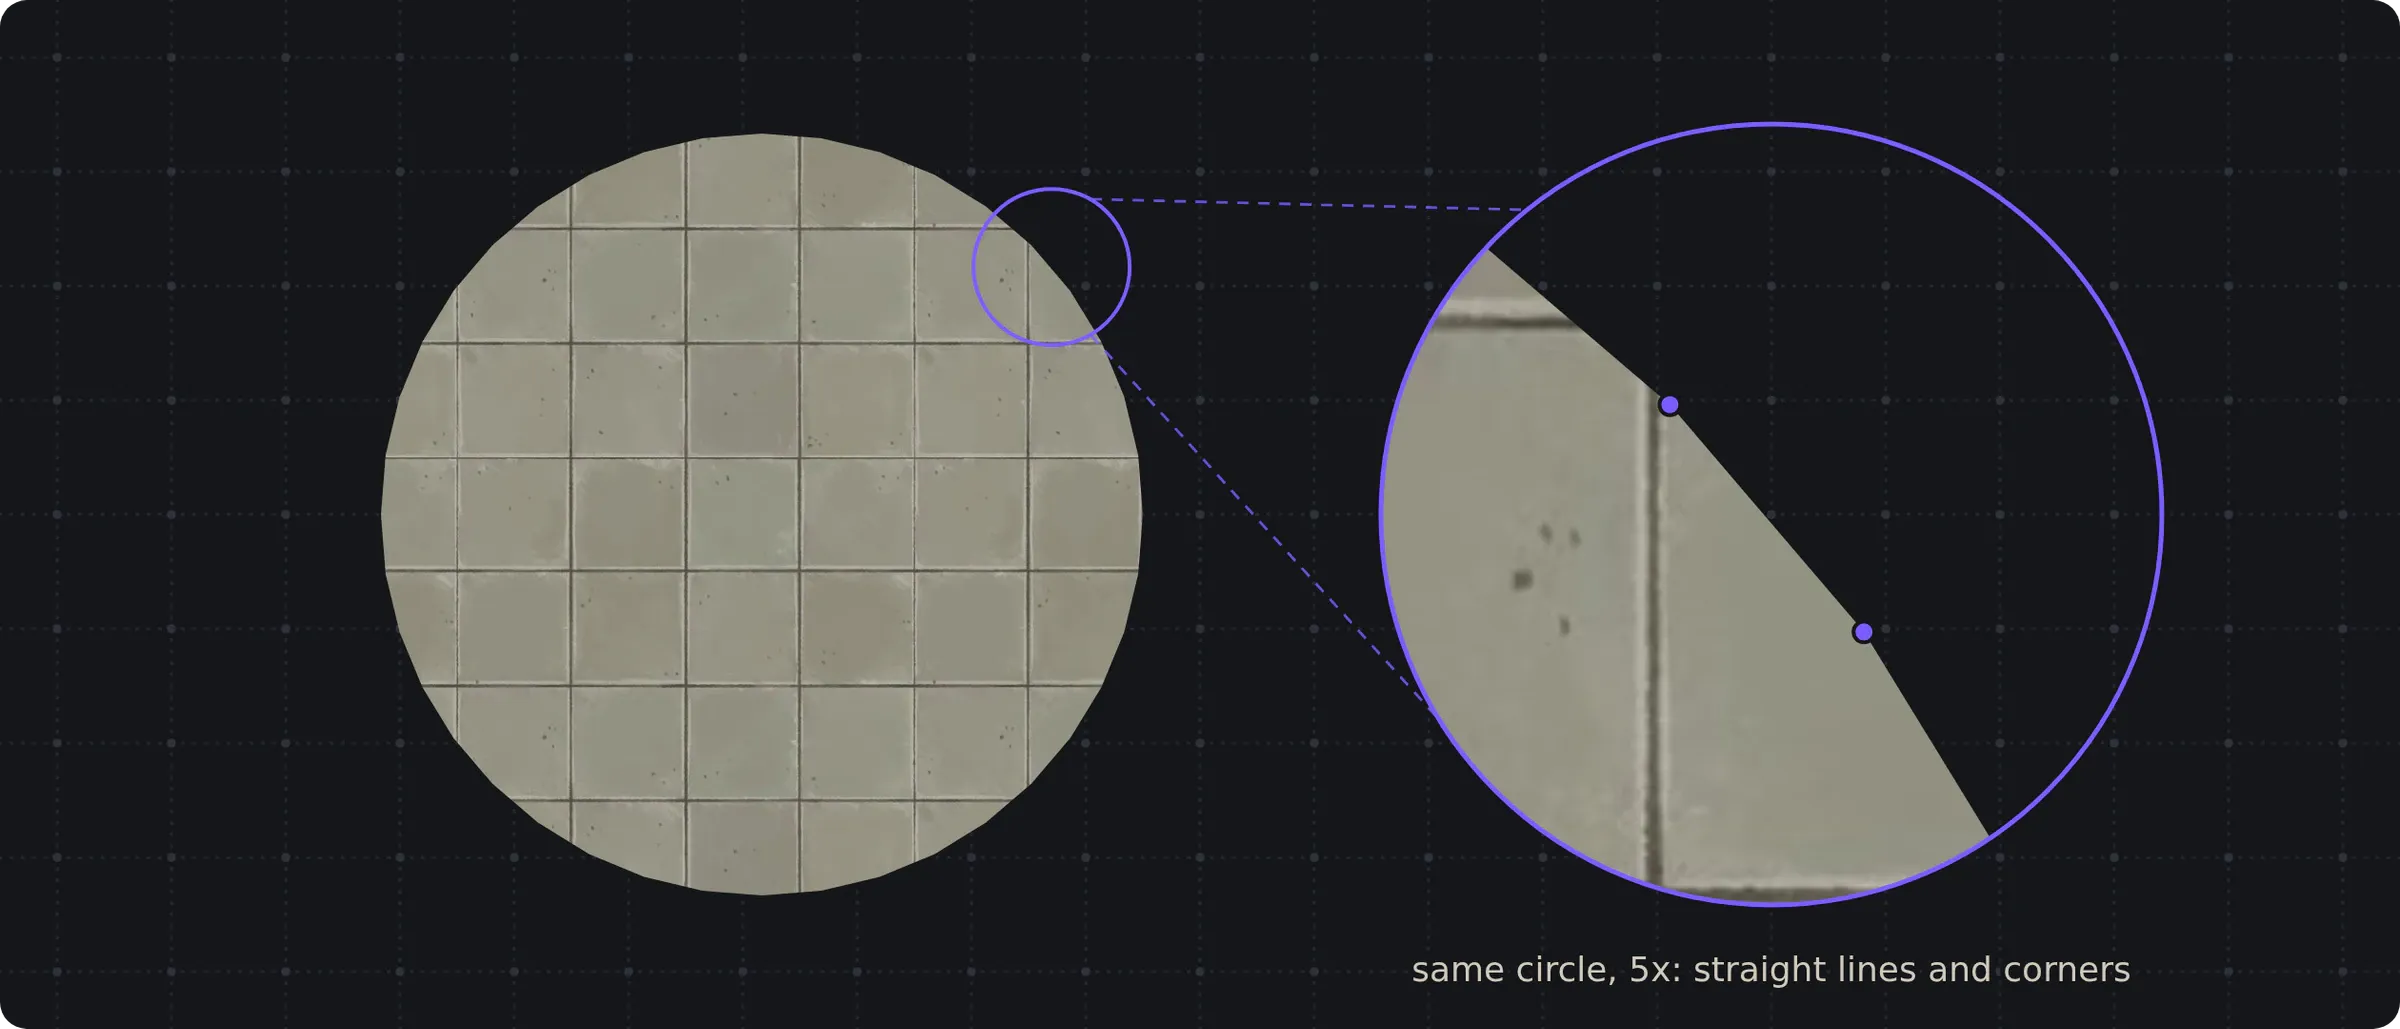
When we look at a circle on a computer, we’re really just looking at a lot of really small lines, each at an angle to each other. Just… an infinity of corners.
And in most cases, that is absolutely fine. We don’t give a crap. Because computers are high def and powerful and we can get a circle with a material in it like this:
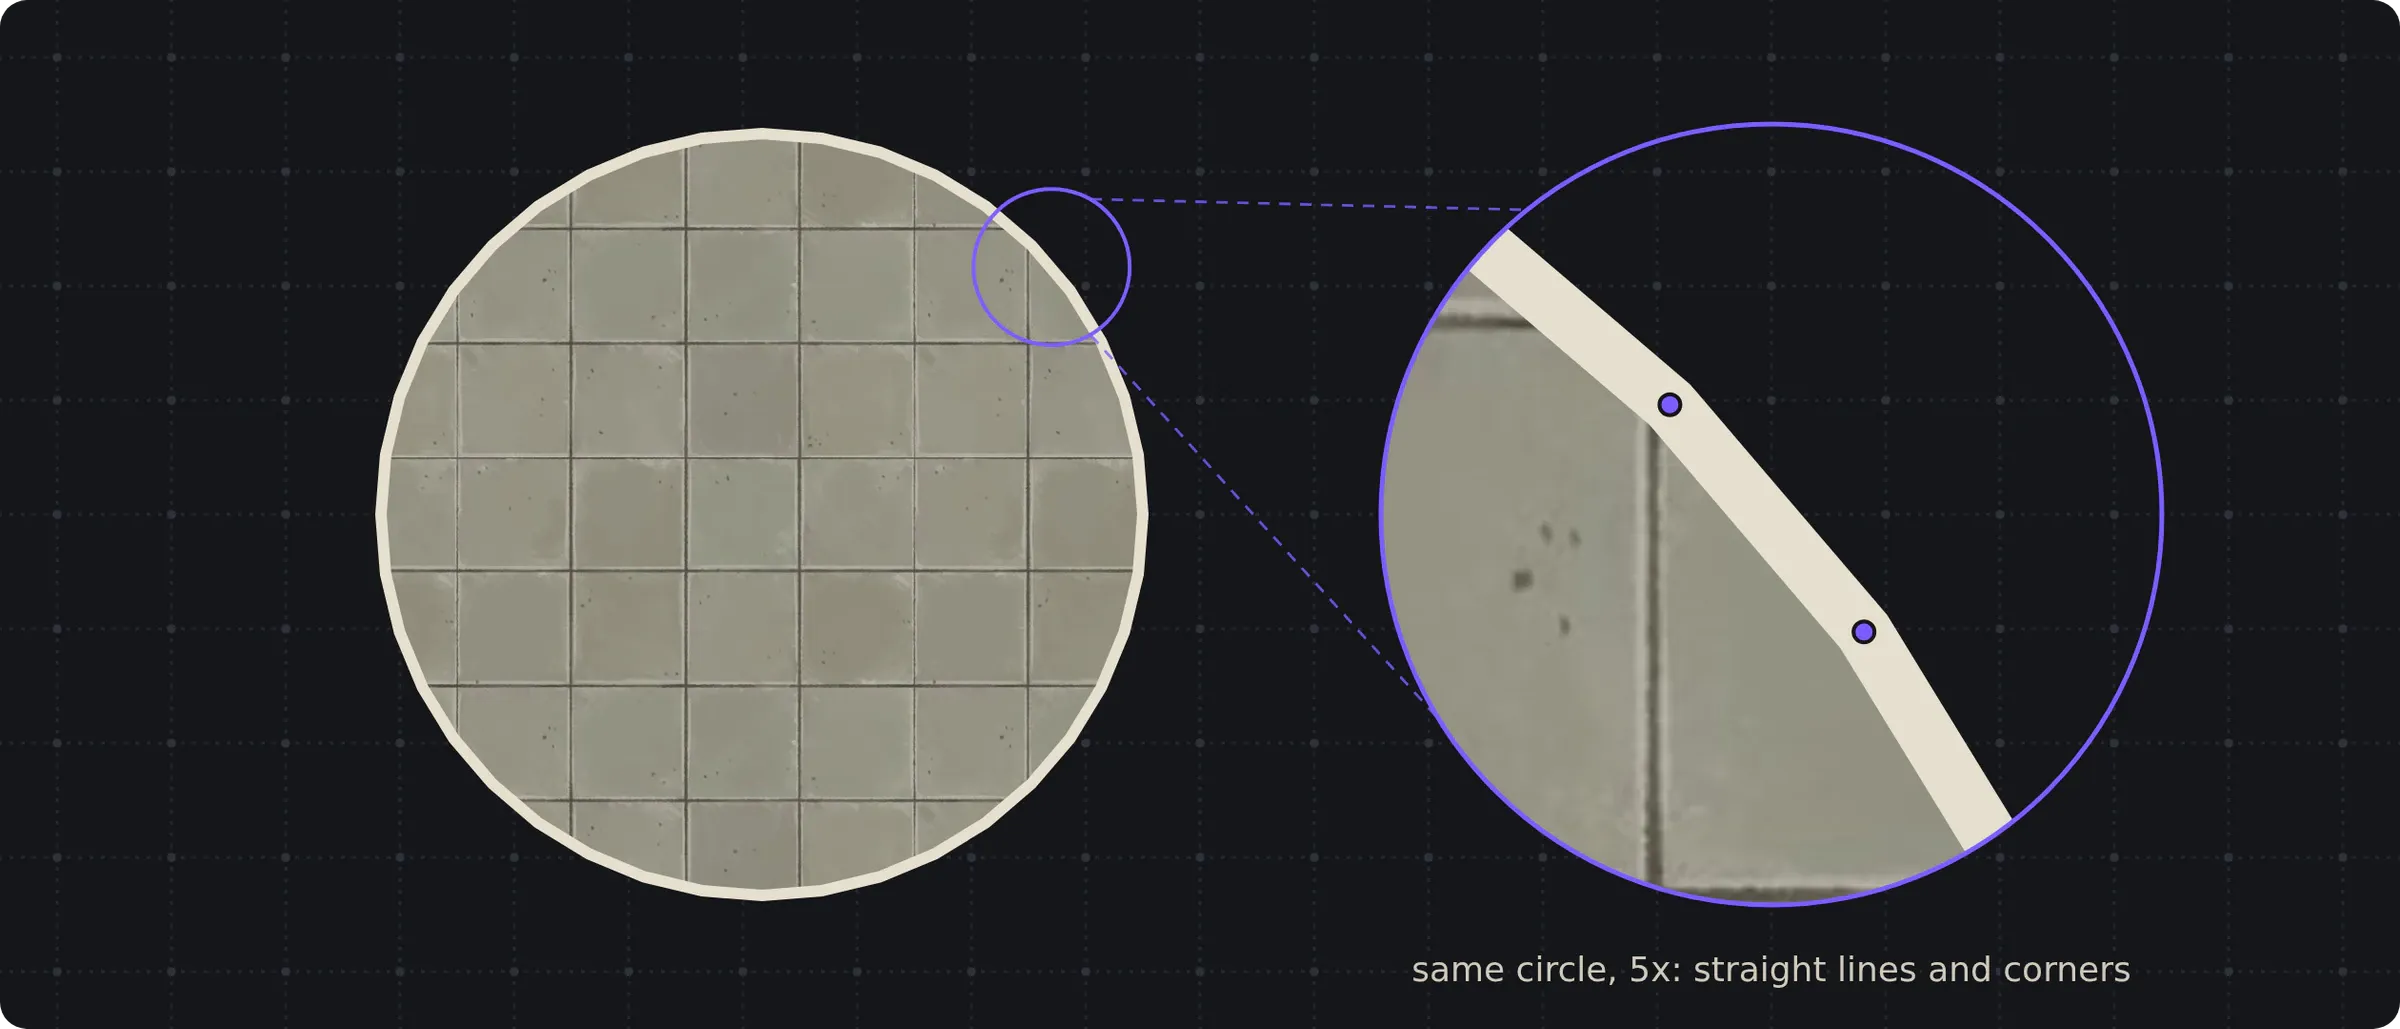
We can even put a line around it, and we have a pretty circle with a border:
But.
BUT BUT BUT.
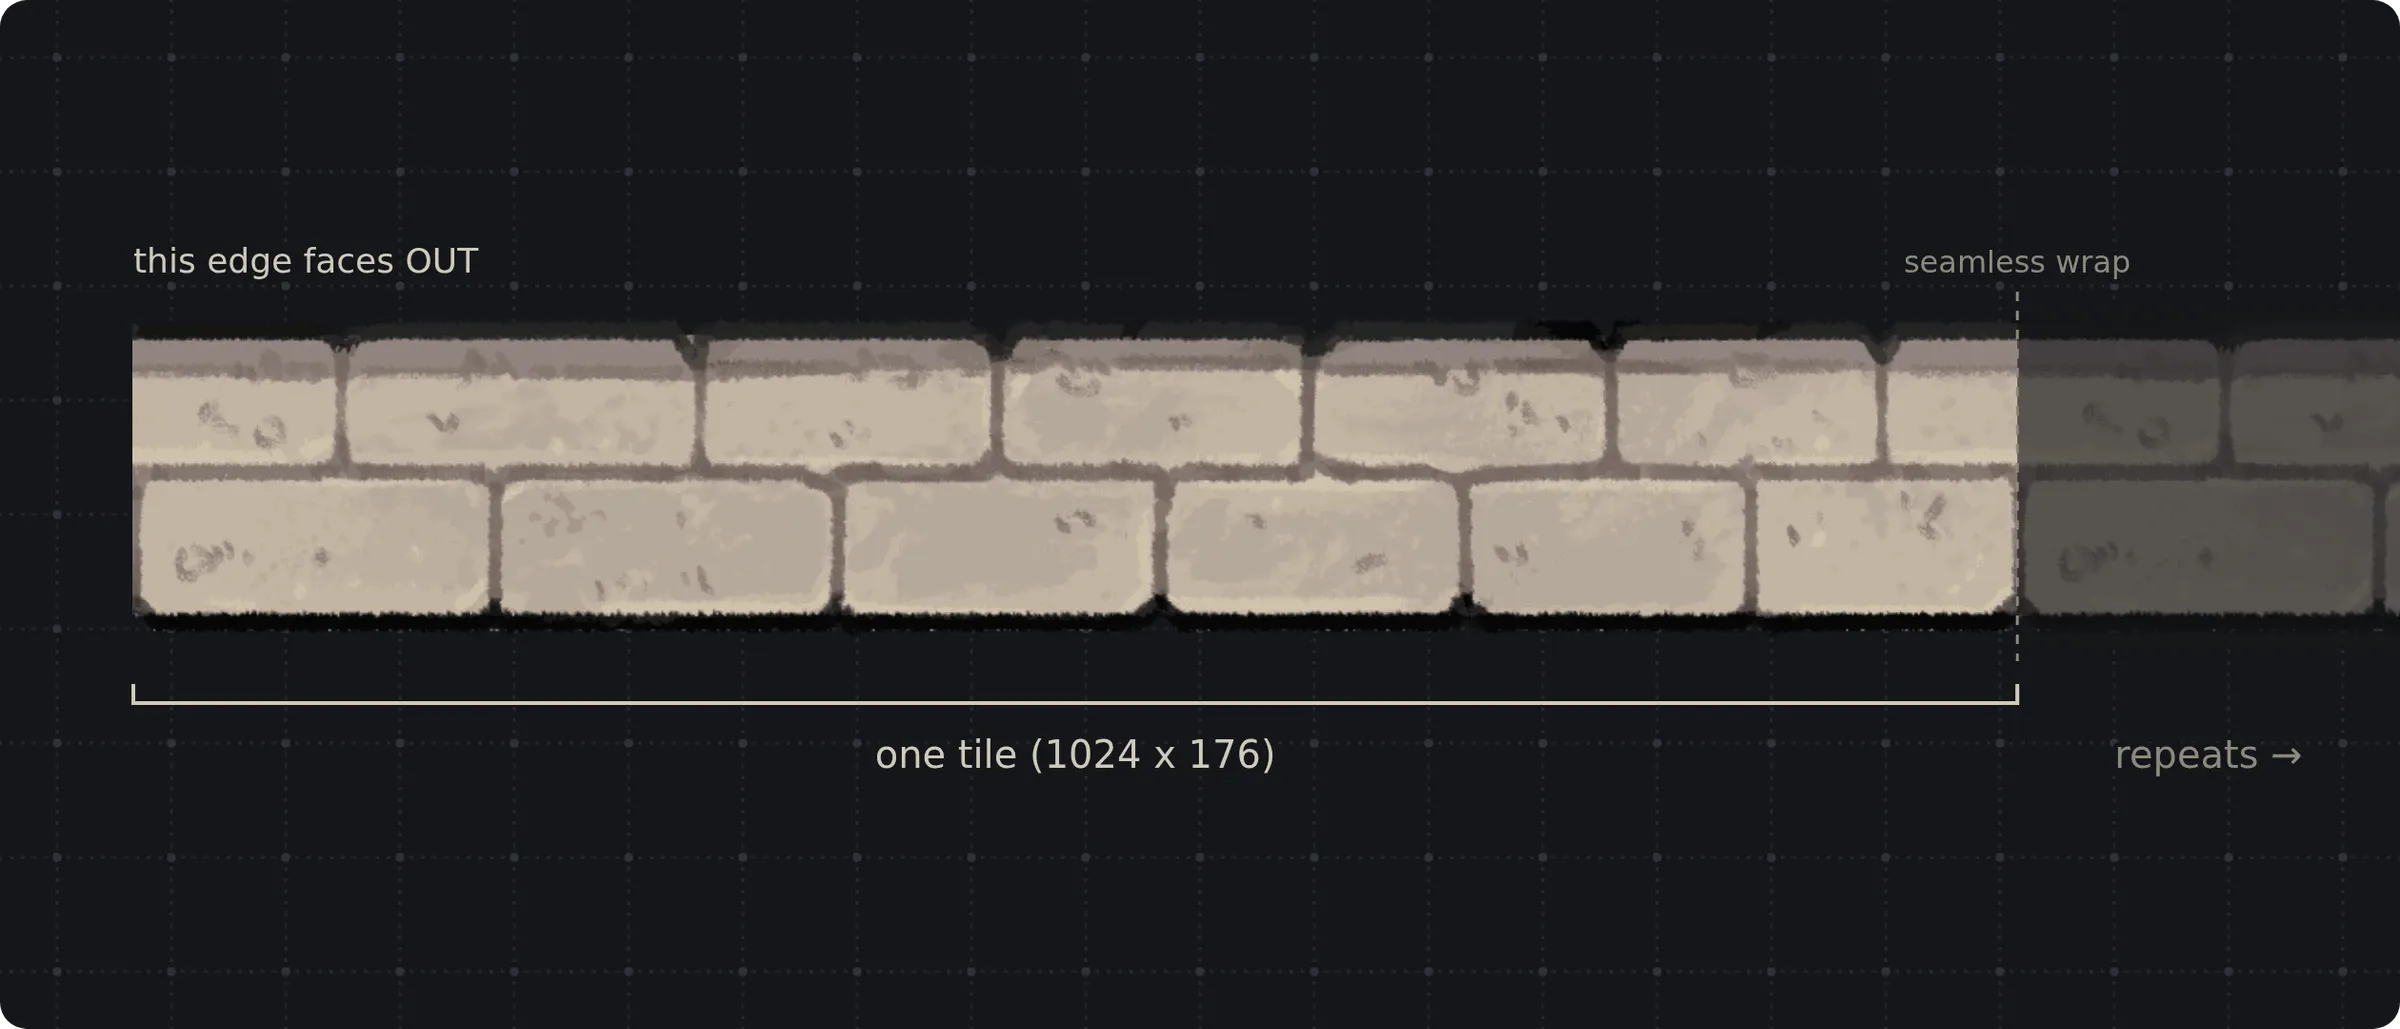
Remember our Stroke assets? These are a graphic that’s a straight line, and just keeps repeating along a line.
But what happens when that line isn’t straight?
We could just lay a straight piece along each segment, but then the corner has a big-ole bite taken out of it.
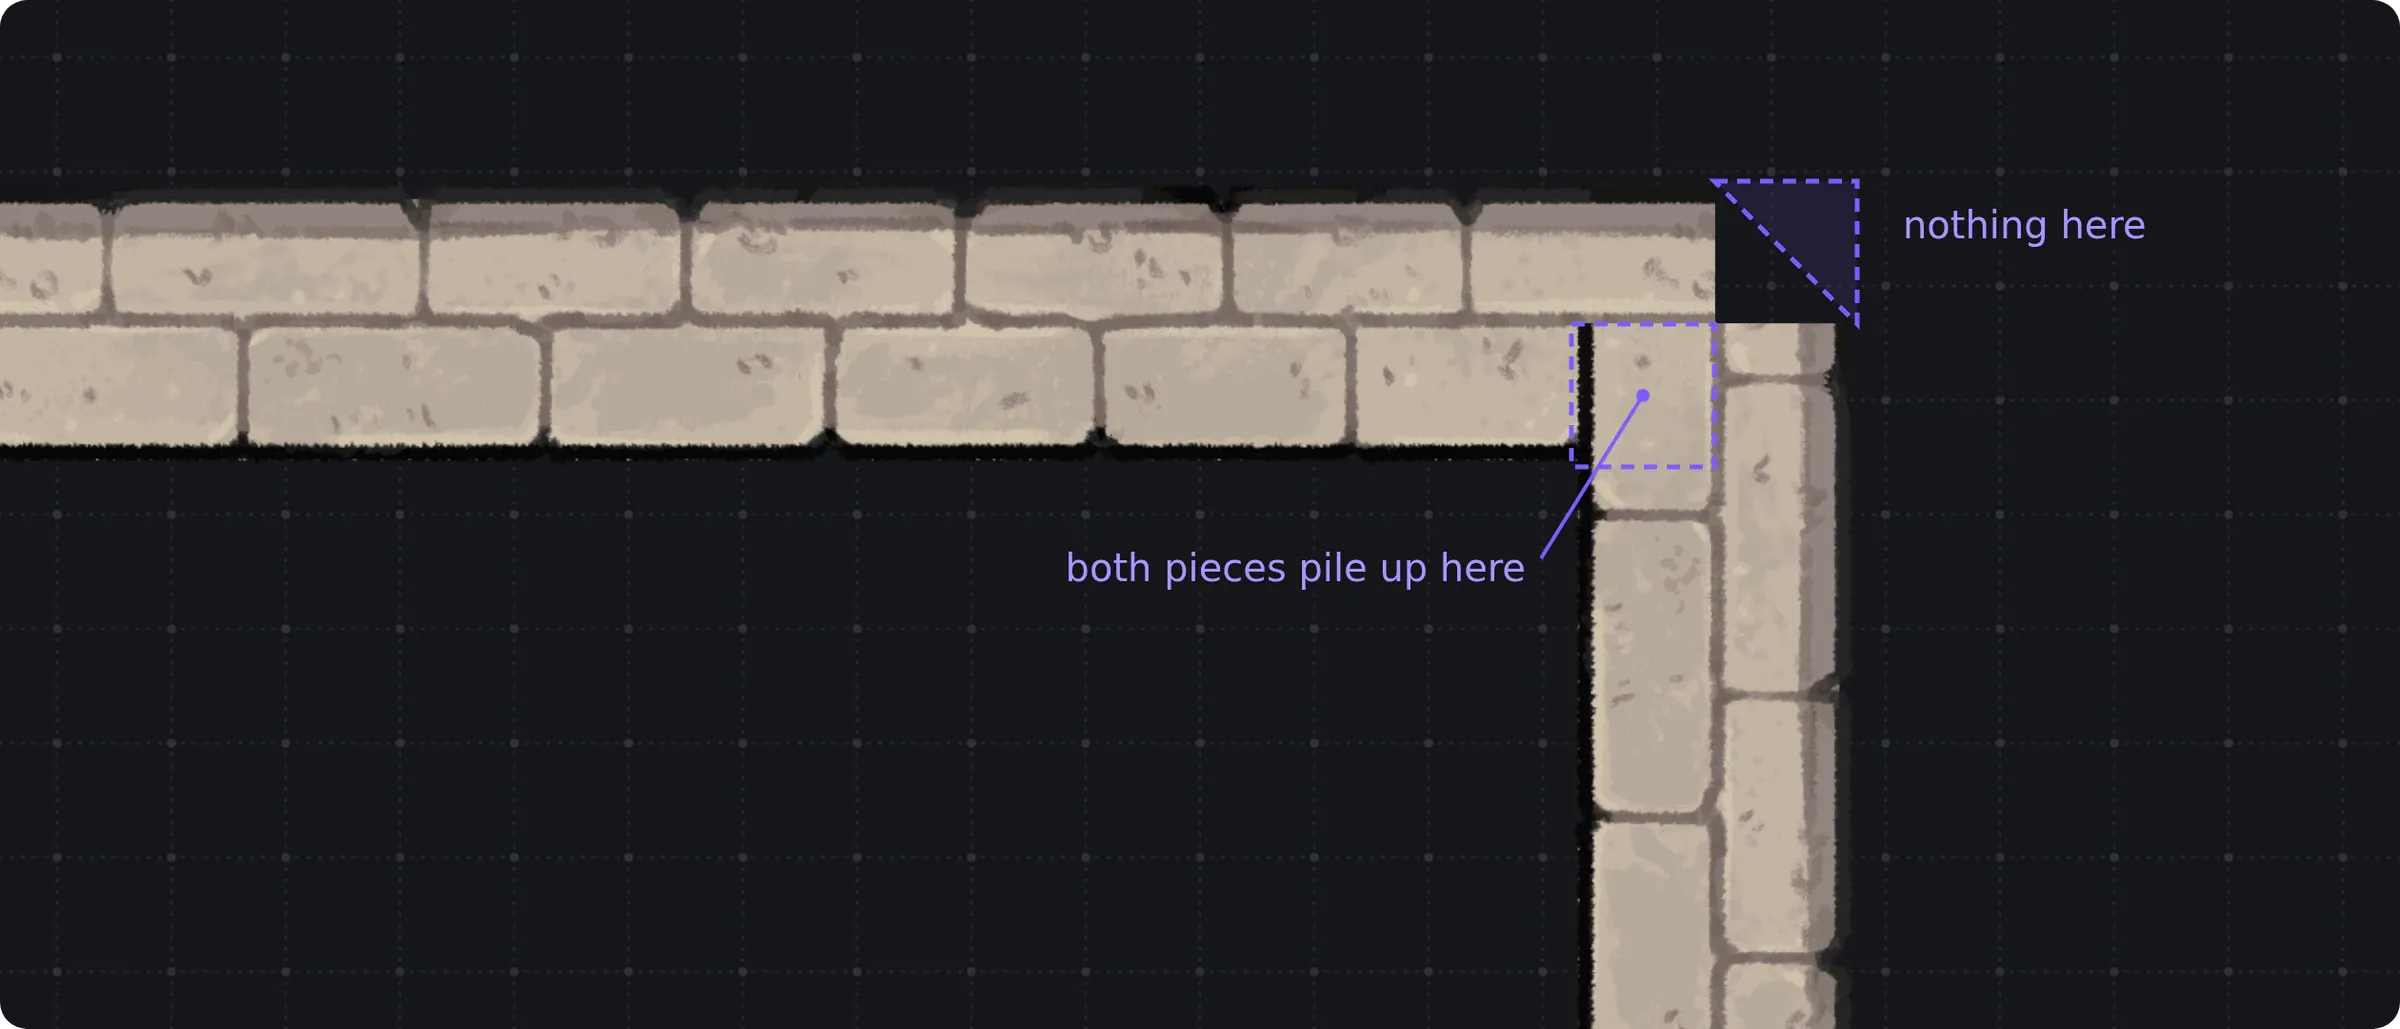
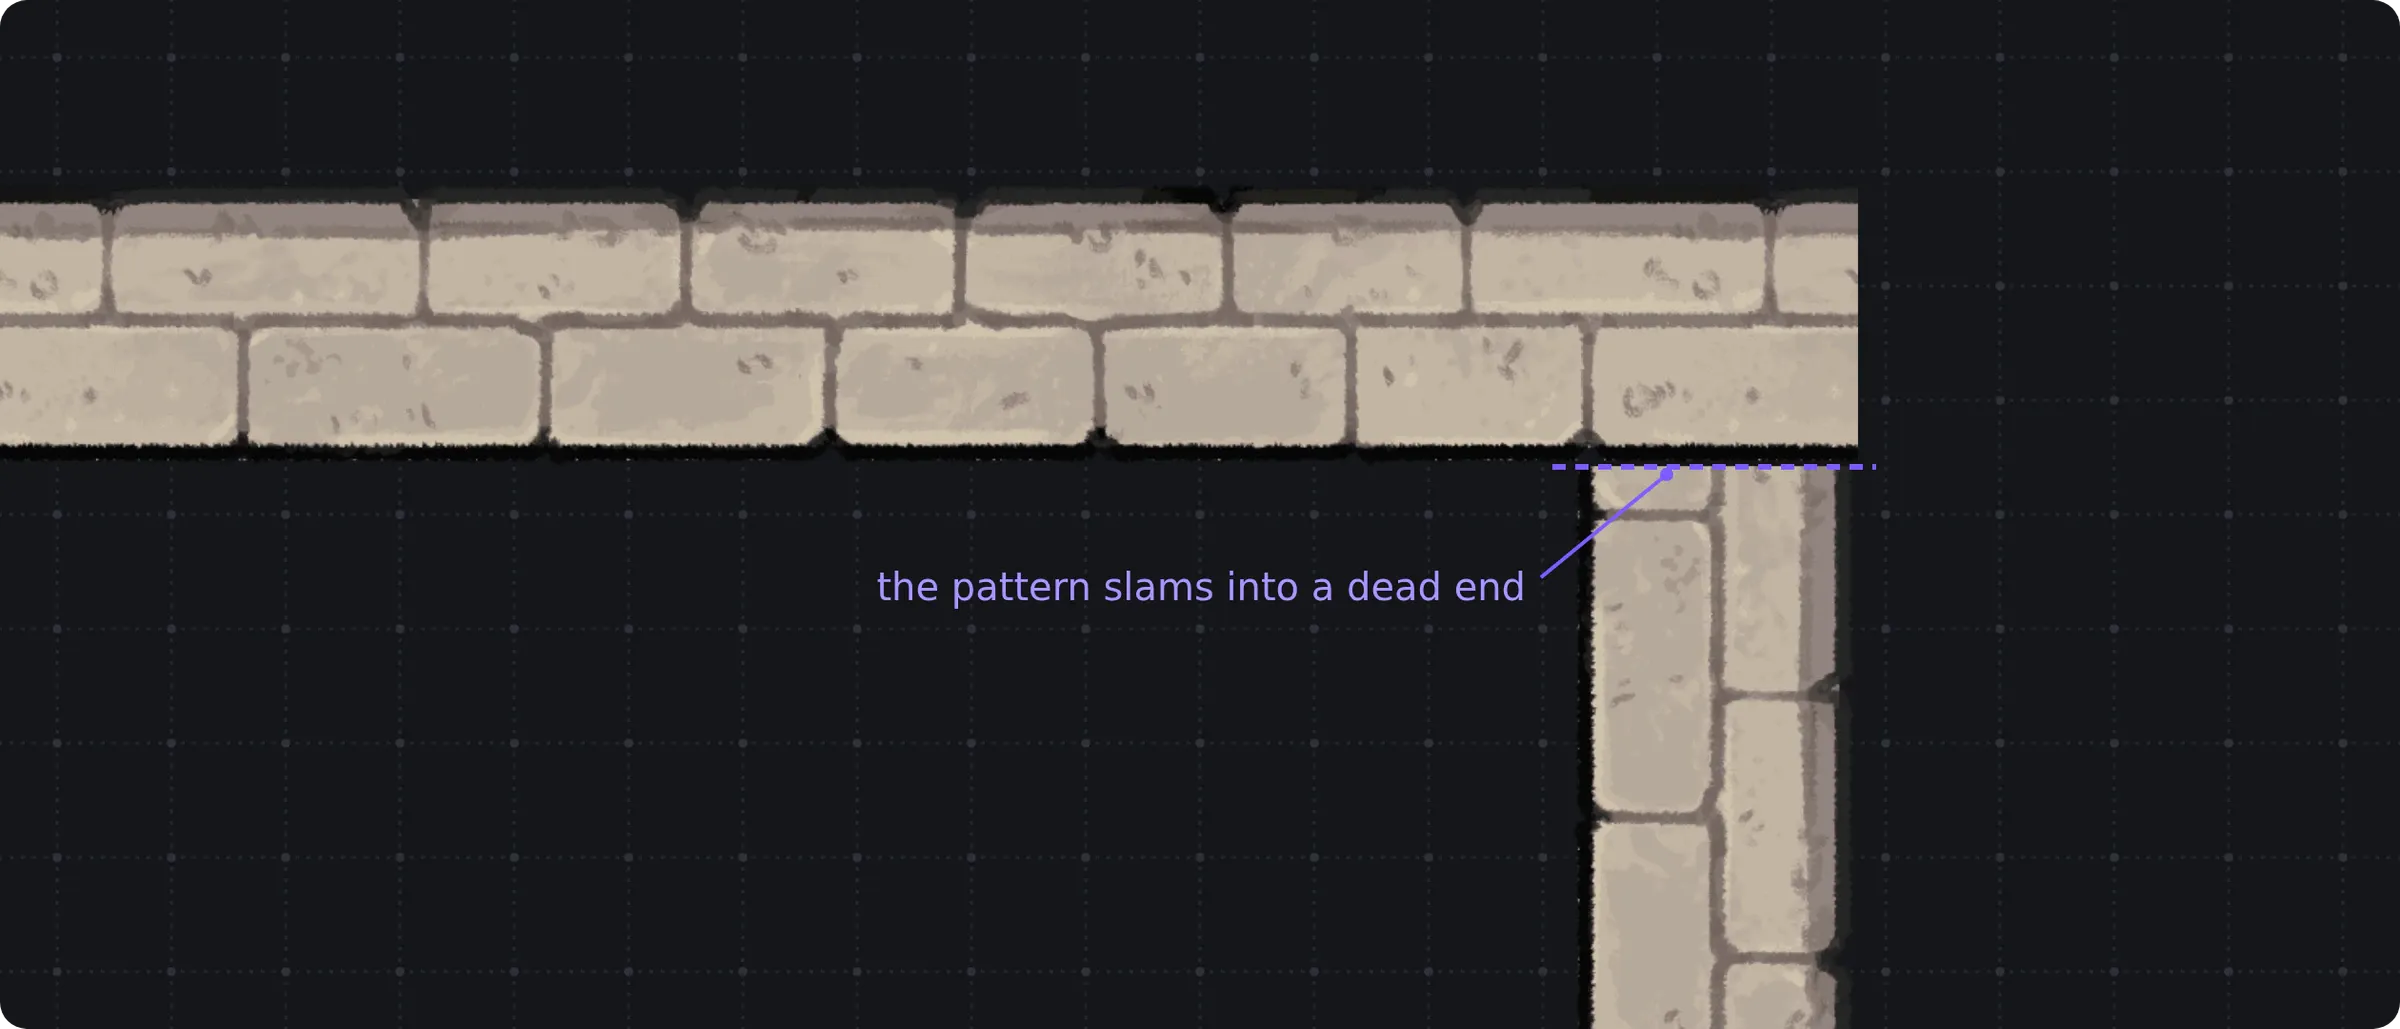
Or we could run one wall straight through and butt the other into it, but any internal pattern just slams into a dead end.
So, we actually need to use a join.
Joins are any point where two line segments meet (or join) — and the way that we render the geometry in between those line segments comes in three different types:
- Miter: sharp angle
- Round: arc it off.
- Bevel: cut it flat.
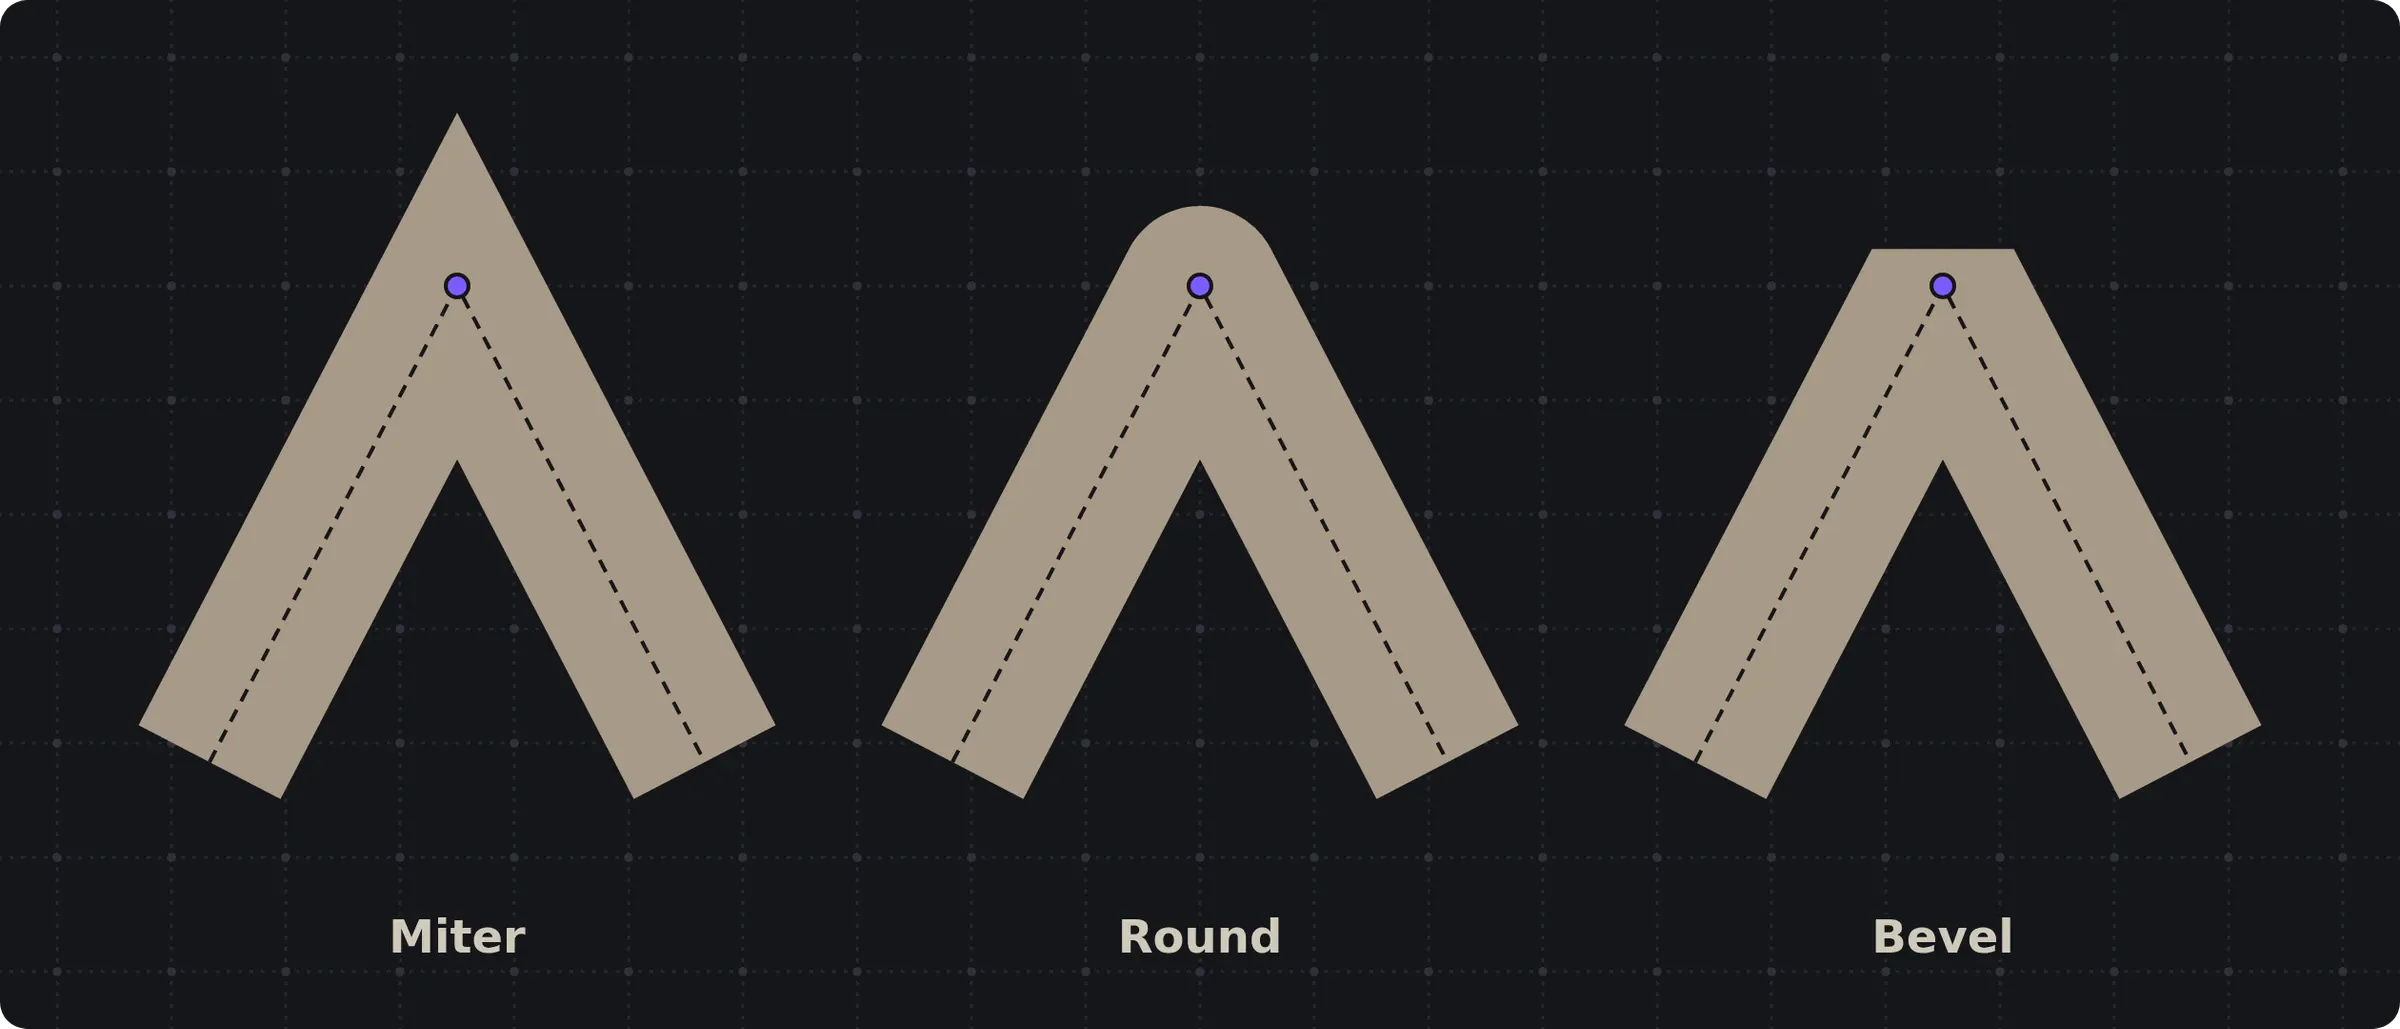
If you’ve ever opened the Stroke panel in Illustrator, you’ve looked at those three little icons a thousand times and never once thought about them. I’ve used them for years, but never thought really about what was going on at the stroke level. It was all easy when it was a simple vector line.
I will be 100% honest. Until I started this process I had no idea how I was even going to do this. I took some recommendations from different game forums and the results were… not great.
Attempt #1: Fan Geometry
The first thing we tried was Fan Geometry. Which seems super simple and an obvious way to accomplish what I wanted. Essentially whenever we get to a curve, we slice the Stroke image into tiny little slivers and then spread them around the corner like a hand of cards.
Here’s how it works. When the line turns, we fill the gap with a bunch of skinny triangles. Each triangle starts at the corner point, goes to the edge of the stroke, and then gets rotate just a little bit further than the last one, until we’ve gone all the way around. Each sliver of the fan grabs the next chunk of the Stroke texture, so the pattern follows the curve of the bend.
In (very) rough code, it looks something like this:
// For every corner in the path...
const startAngle = angleOf(incomingSegment);
const endAngle   = angleOf(outgoingSegment);
const slices     = 8; // more slices = smoother fan

for (let i = 0; i < slices; i++) {
    const a1 = lerp(startAngle, endAngle, i / slices);
    const a2 = lerp(startAngle, endAngle, (i + 1) / slices);

    // Every sliver starts at the exact same spot: the corner
    const center = corner;
    const edge1  = corner + direction(a1) * halfWidth;
    const edge2  = corner + direction(a2) * halfWidth;

    // ...and grabs the next little chunk of the Stroke texture
    const u1 = textureOffset + (i / slices) * cornerLength;
    const u2 = textureOffset + ((i + 1) / slices) * cornerLength;

    drawTriangle(
        { pos: center, uv: [u1, 0.5] },
        { pos: edge1,  uv: [u1, 1.0] },
        { pos: edge2,  uv: [u2, 1.0] },
    );
}
Deal out the cards, one sliver at a time.
In theory it was perfect.
In reality, not so much:
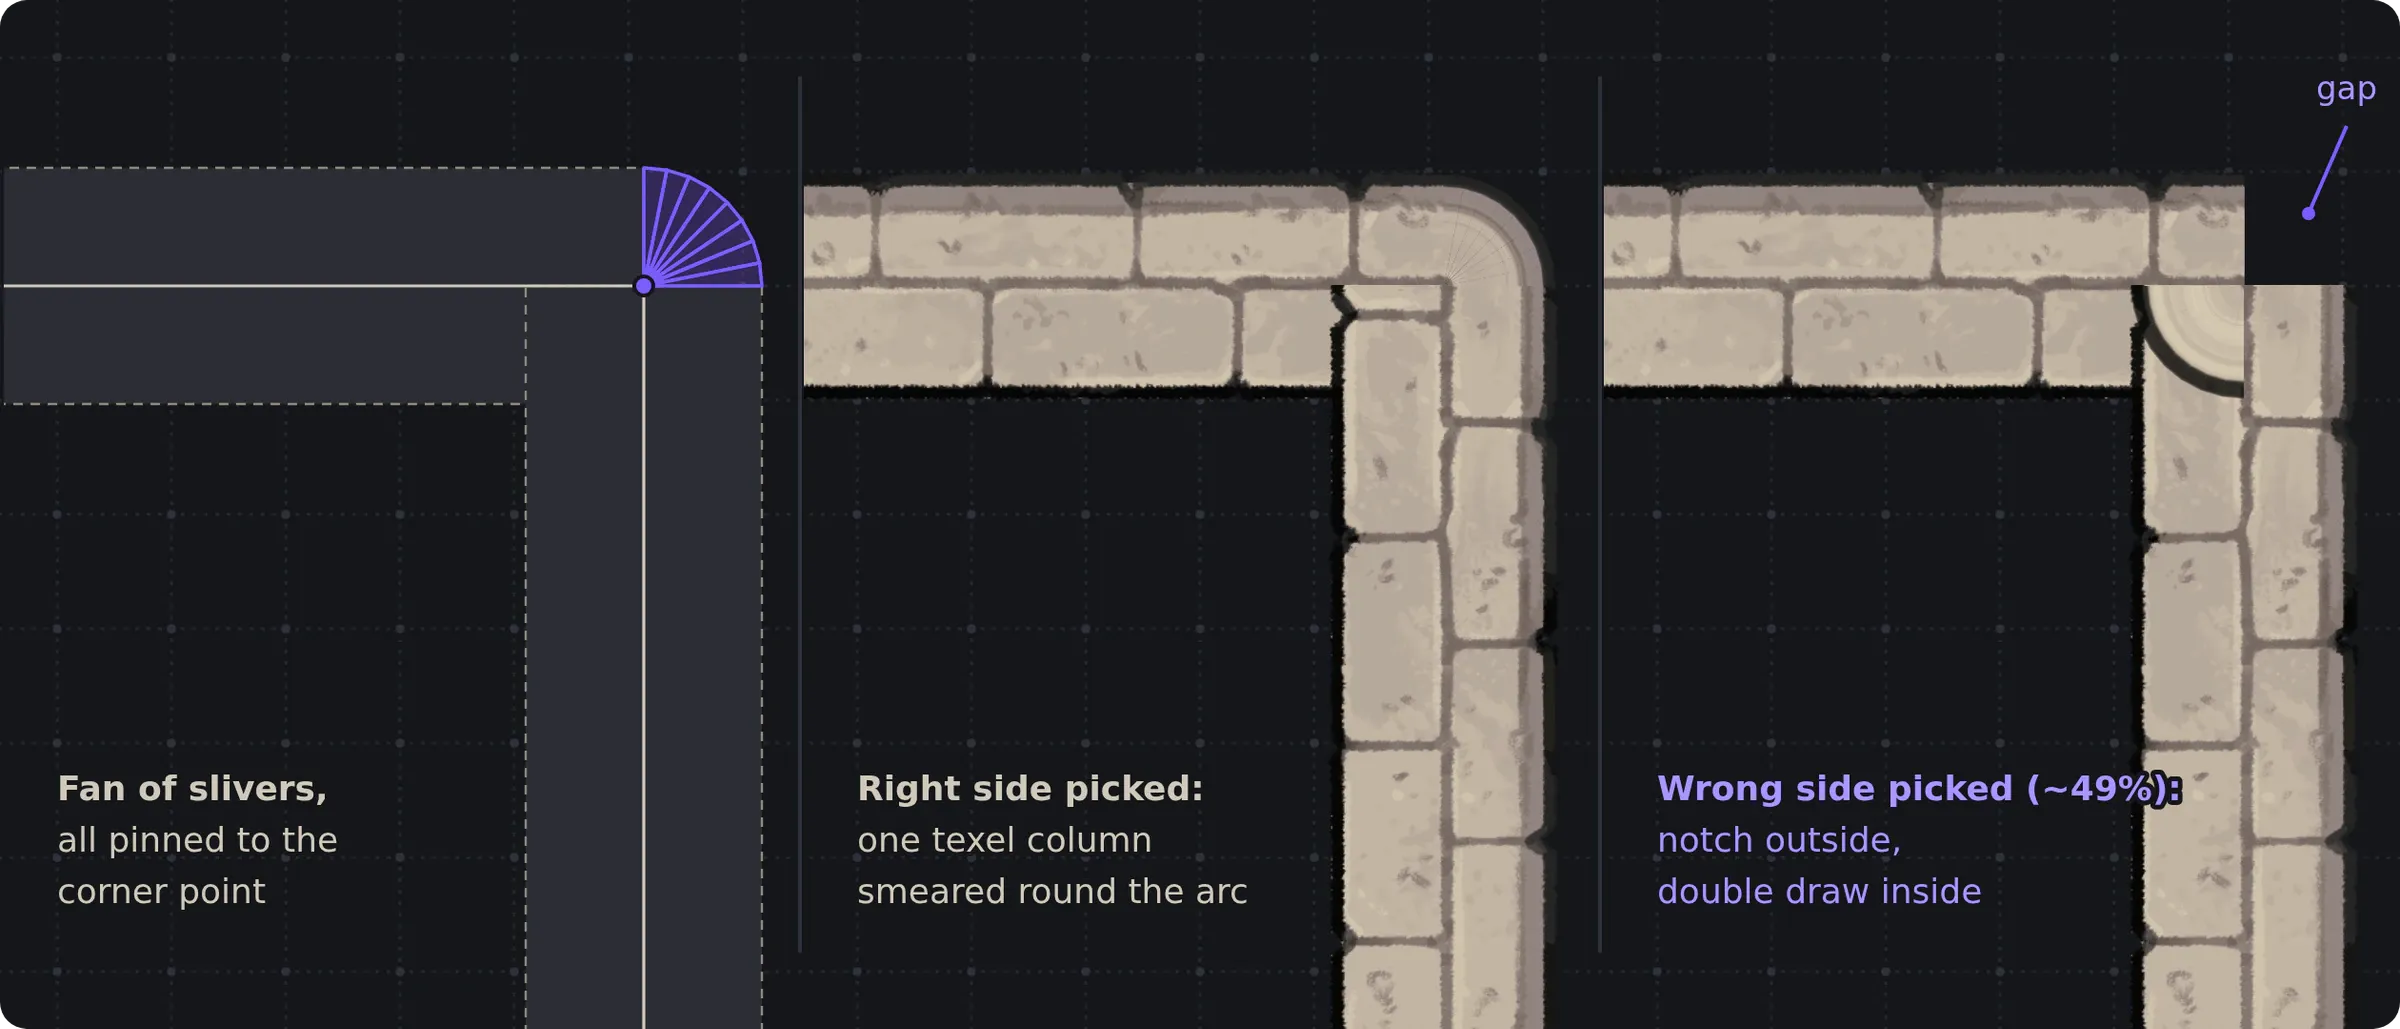
Half my corners had a chunk missing on the outside and a weird smeared blob on the inside. The other half looked… fine? Which is the worst kind of bug.
Here’s the thing about a corner. The two segments overlap on the inside of the turn and leave a wedge-shaped gap on the outside. The fan goes in the gap. So step one is figuring out which side the gap is on.
The right way to do that is a cross product. I know this because I calculated the cross product. And then, directly underneath it, I wrote this:
// Instead of using cross product to determine which side has the gap,
// just measure the distance between vertex pairs
const outerDist = Math.hypot(segBefore.endOuter - segAfter.startOuter)
const innerDist = Math.hypot(segBefore.endInner - segAfter.startInner)
if (outerDist > innerDist) { /* fan on outer side */ } else { /* inner side */ }
And that.. seems reasonable. There’s the bigger gap — and that’s the side that we need to fill… But those two distances are always mathmatically identical. The pairs of points are the same corner, just pushed out in opposite directions. So outerDist > innerDist gets decided by floating-point founding noise.
That made the corners be a coin flip on which side gets the corner. Against 2,000 attempts it was wrong 49% of the time.
And even when it randomly did get it right, every point on the fan was sampling the same spot on the texture. So instead of having the stones flow around the corner (also, have you seen stones flow? not pretty), I got one section of the texture smeared around the arc.
Attempt #2: The Bevel
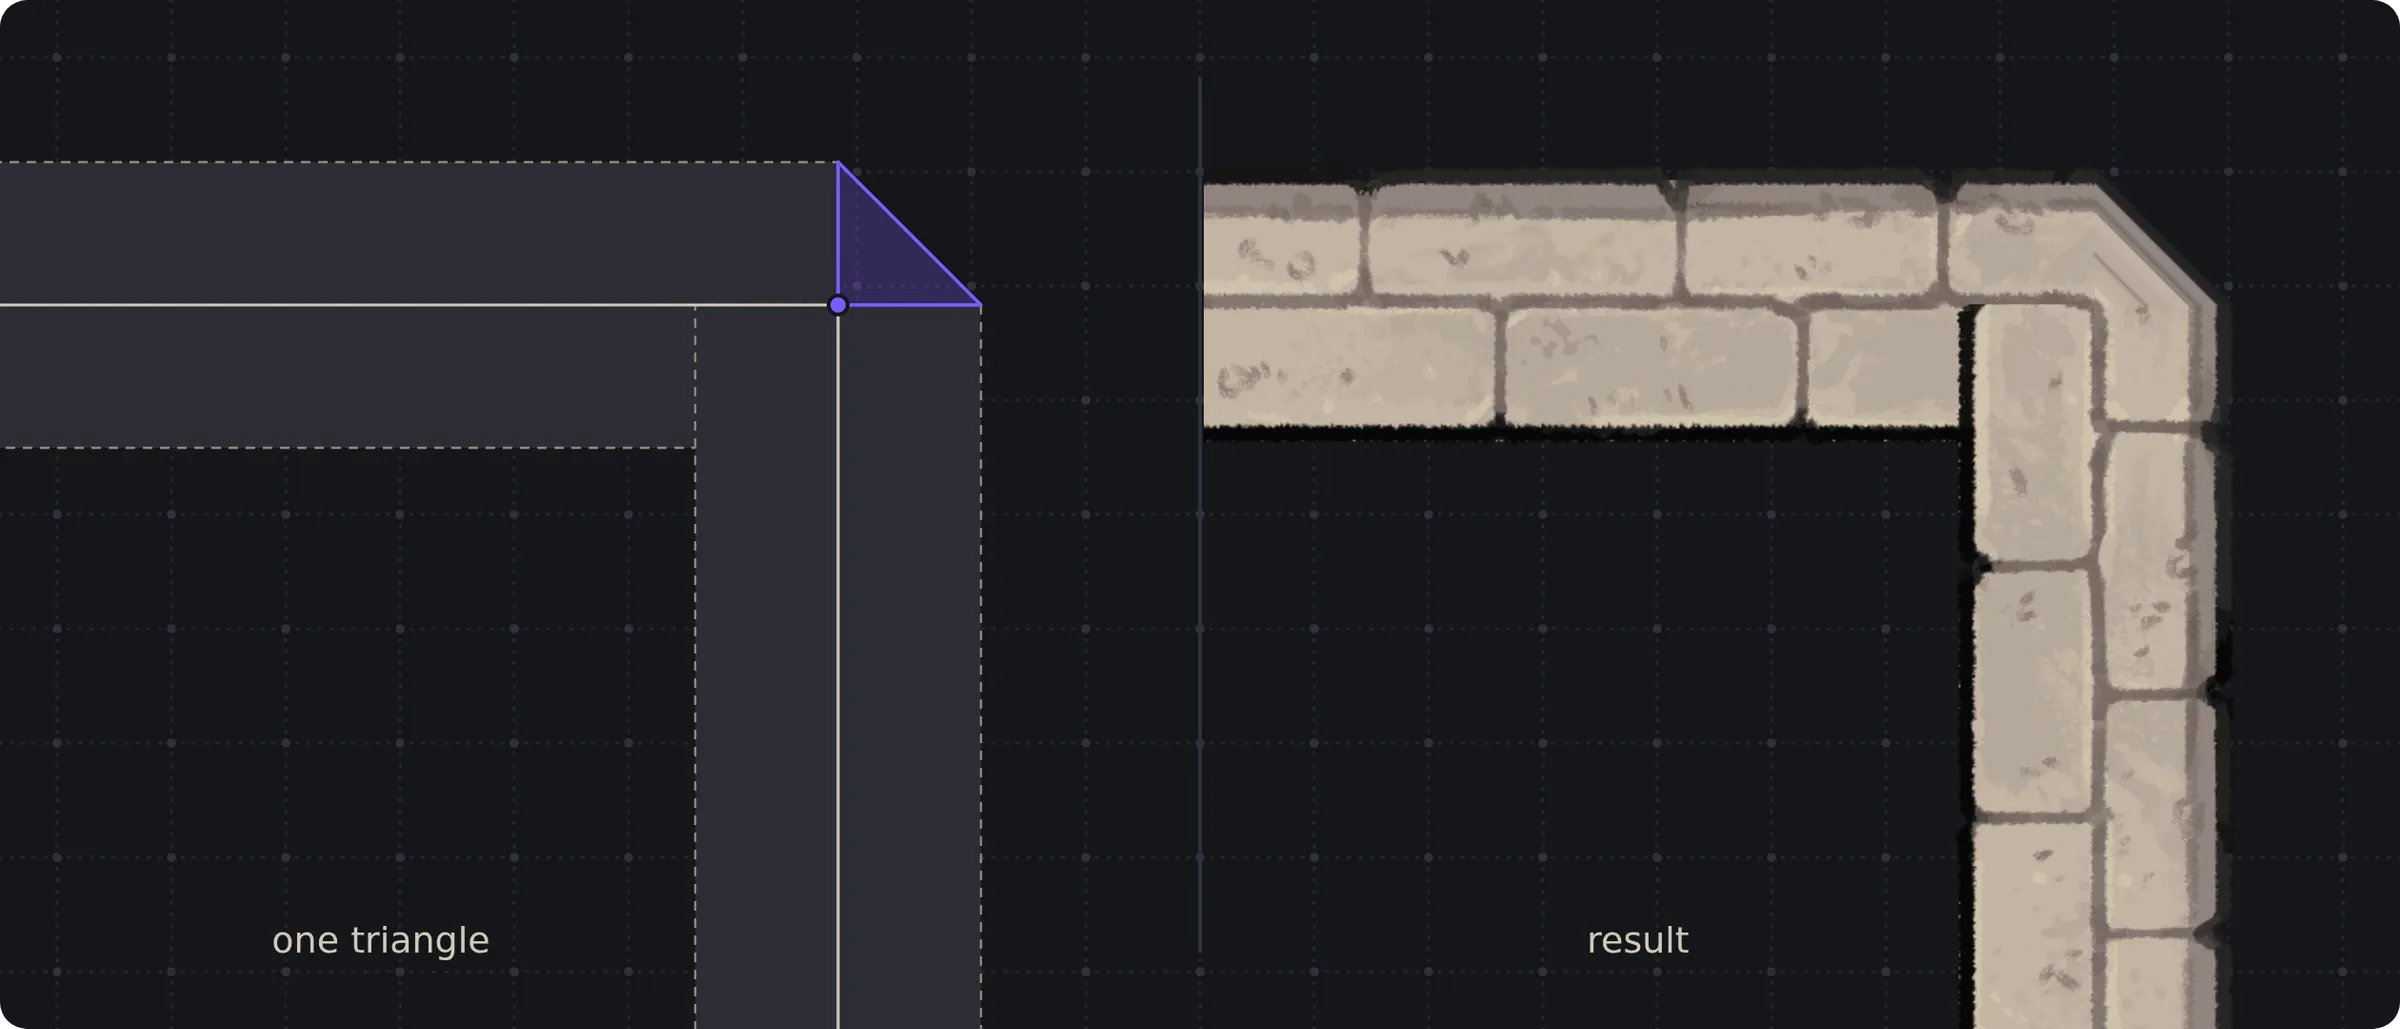
Eventually I came to the realization that what was going to do the job was a bevel cut. Essentially lopping the point of the corner off flat
And a bevel is… one triangle.
Dammit.
That’s it. That’s the whole feature. Take the point where the two segments meet, take the two loose edge points on the outside of the turn, and draw a triangle between them.
// Bevel triangle: corner center, segA edge vertex, segB edge vertex
if (cross < 0) {
    indices[indexIdx++] = cornerVertexIdx;
    indices[indexIdx++] = gapOuter;
    indices[indexIdx++] = actualGapInner;
} else {
    indices[indexIdx++] = cornerVertexIdx;
    indices[indexIdx++] = actualGapInner;
    indices[indexIdx++] = gapOuter;
}
The only fiddly bit is knowing which way the corner turns, because the gap is always on the outside of the turn. That’s what the cross check is for.
Yup. The same cross product I calculated and ignored in Attempt #1.
Oh, and one more gotcha. On a closed shape, the last corner connects the end of the texture back to the start. So that final triangle has one foot at the very end of the border and one foot at the very beginning, and the renderer helpfully crams the ENTIRE border’s worth of texture into one tiny triangle. The fix is to duplicate that point and tell it “no, you’re at the end, not the start.”
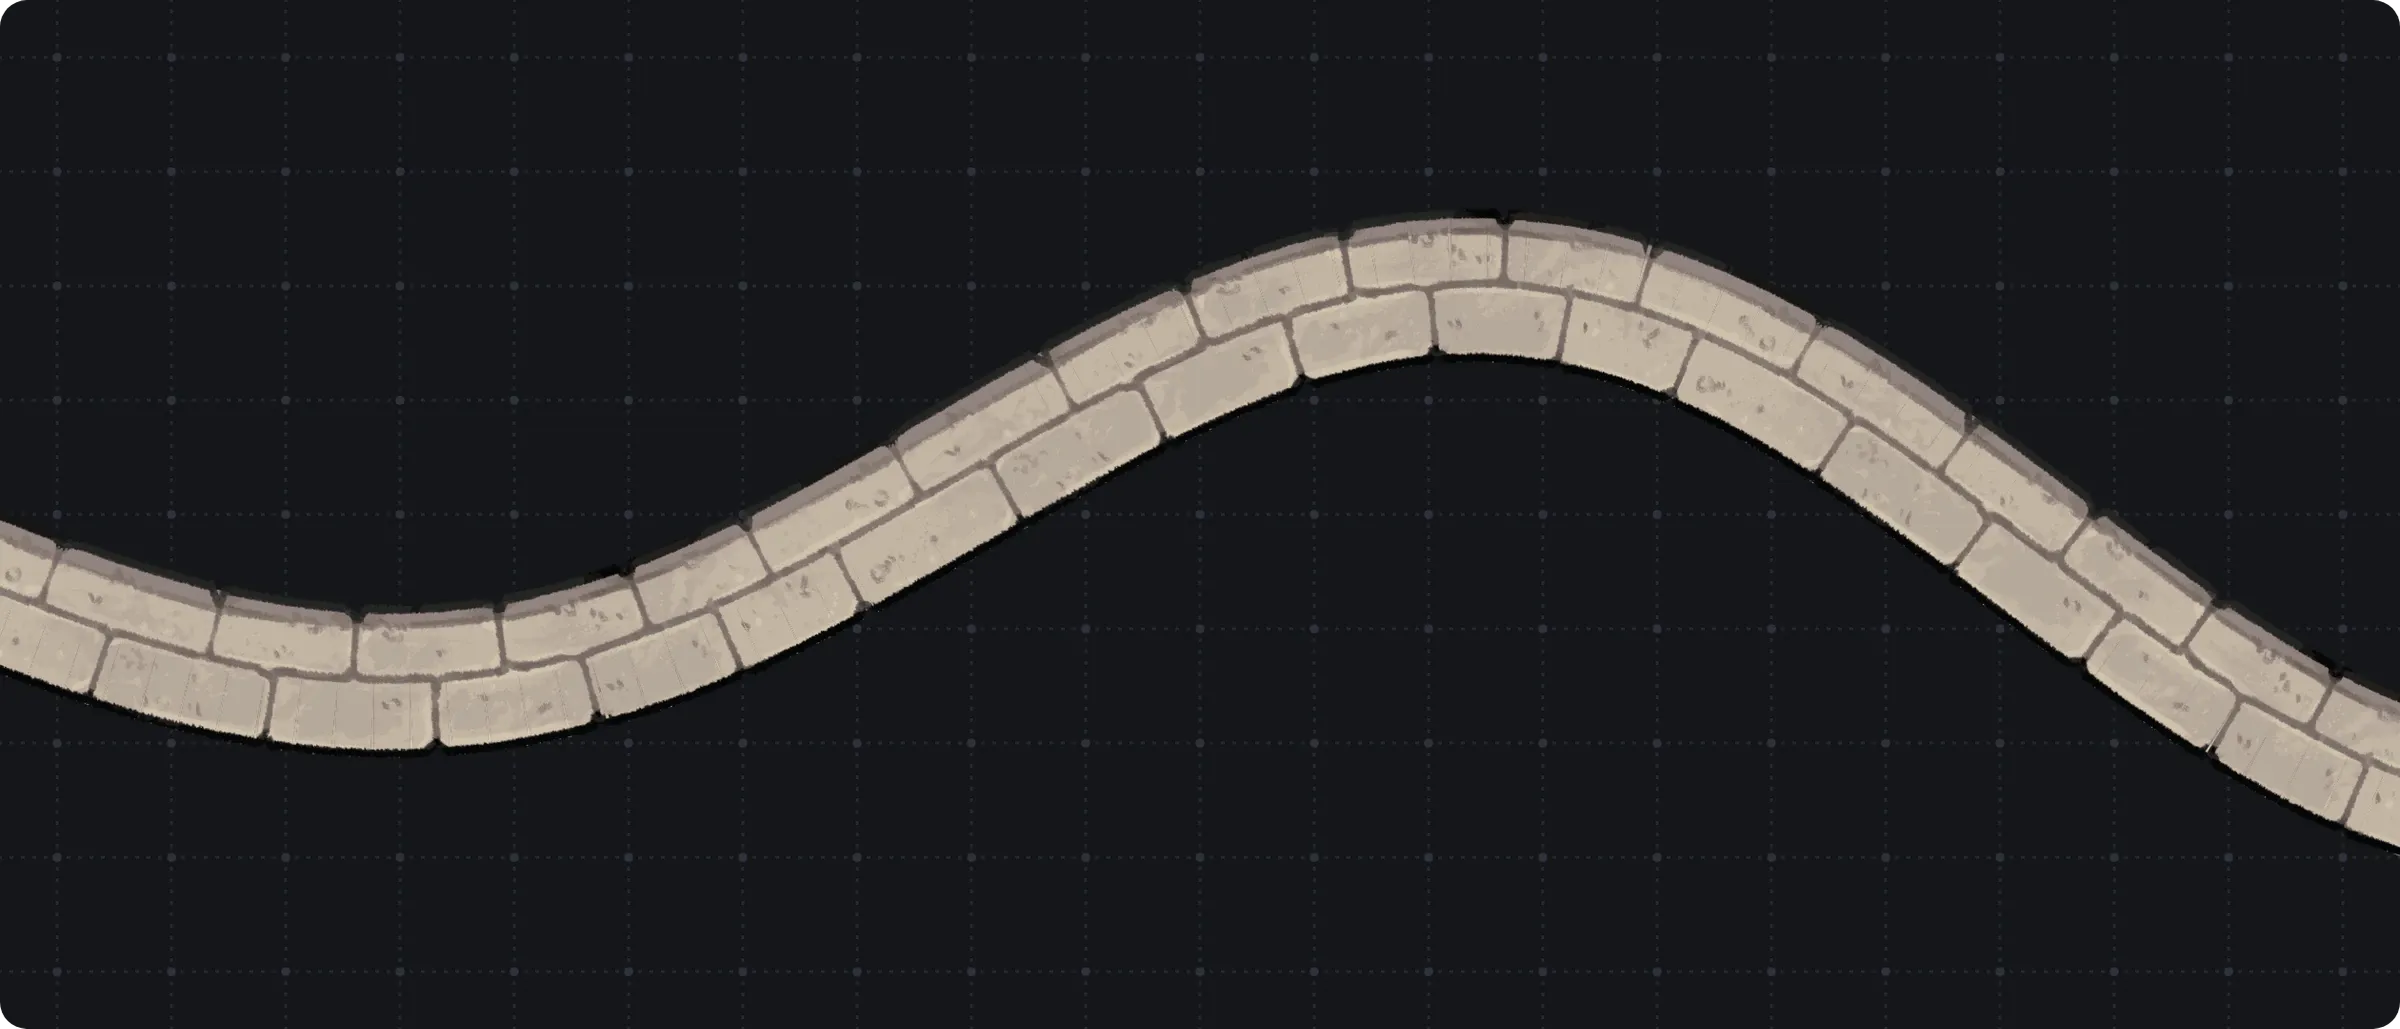
At first I thought this was going to be too simple, and only handle strong angles, but it ended up working on both wall corners and softer corners like curves and circles.
I was NOT expecting that.
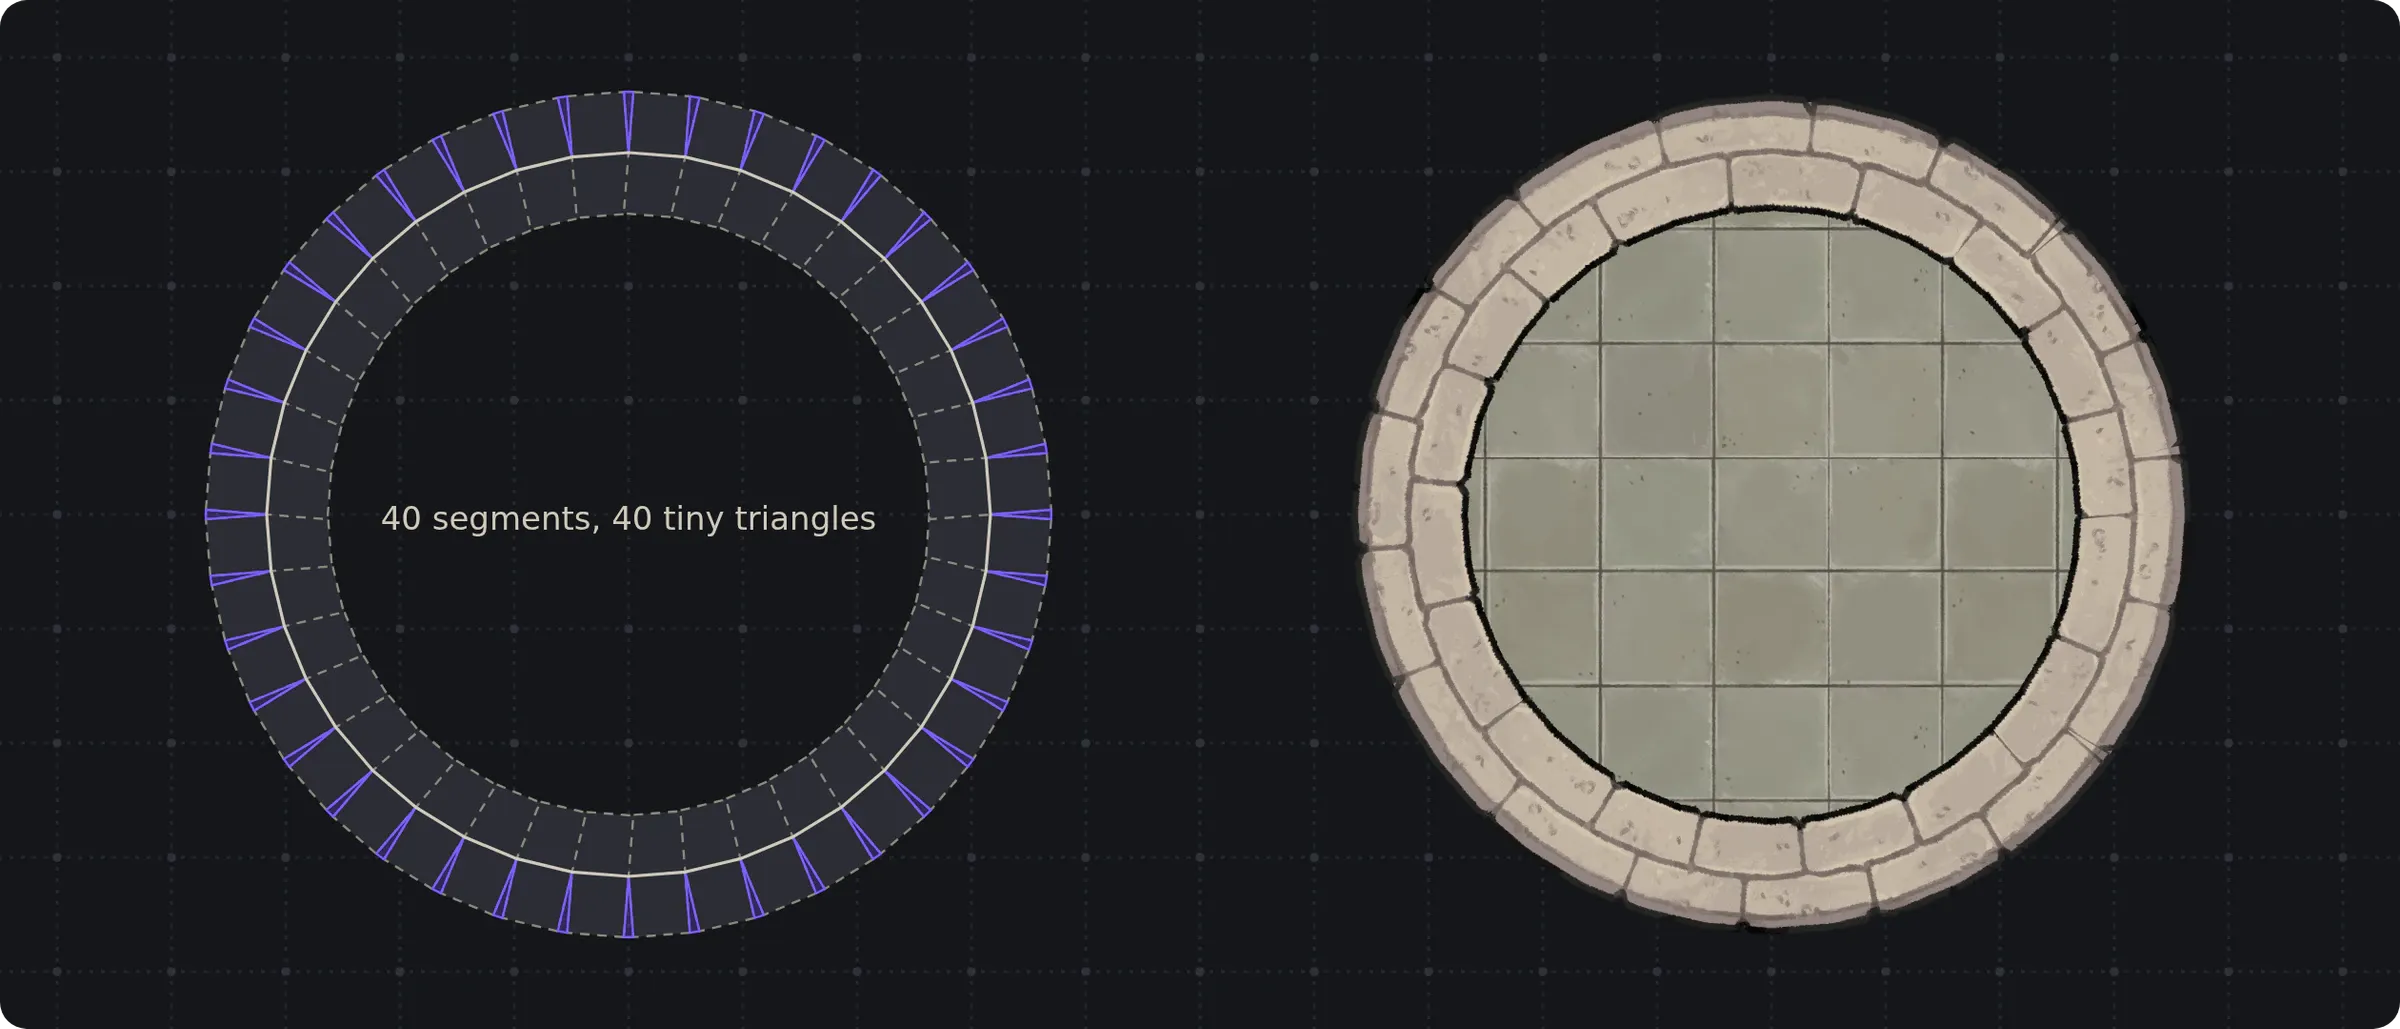
Remember the circle from the top? The one that’s secretly an infinity of tiny corners?
Well, a bevel on a tiny corner is just a tiny triangle. When we get a lot of tiny triangles and string them around a curve, we get (of course) a curve. But this means that because of our beveling strategy for 90° dungeon walls, we can also support round ponds, winding rivers, and really any shape without any special casing at all.
While I was in there
Fixing corners meant staring at borders for about two weeks straight. Which is how I found two more bugs hiding in plain sight.
Bug #1: Inside-out borders
A Stroke texture has a top and a bottom. One side is supposed to face out, the other faces in. Which side actually ends up facing out depends on which direction you drew the shape.
Clockwise? Great.
Counter-clockwise? Your wall is now inside out.
And it gets better. Mirror a room and you’ve secretly reversed the order of every point in it. So a room that looked totally fine would turn itself inside out the second you flipped it.
The fix is honestly kind of boring. Every closed shape gets forced into clockwise order, and mirroring flips the points back. Now the border always knows which way is “out.”
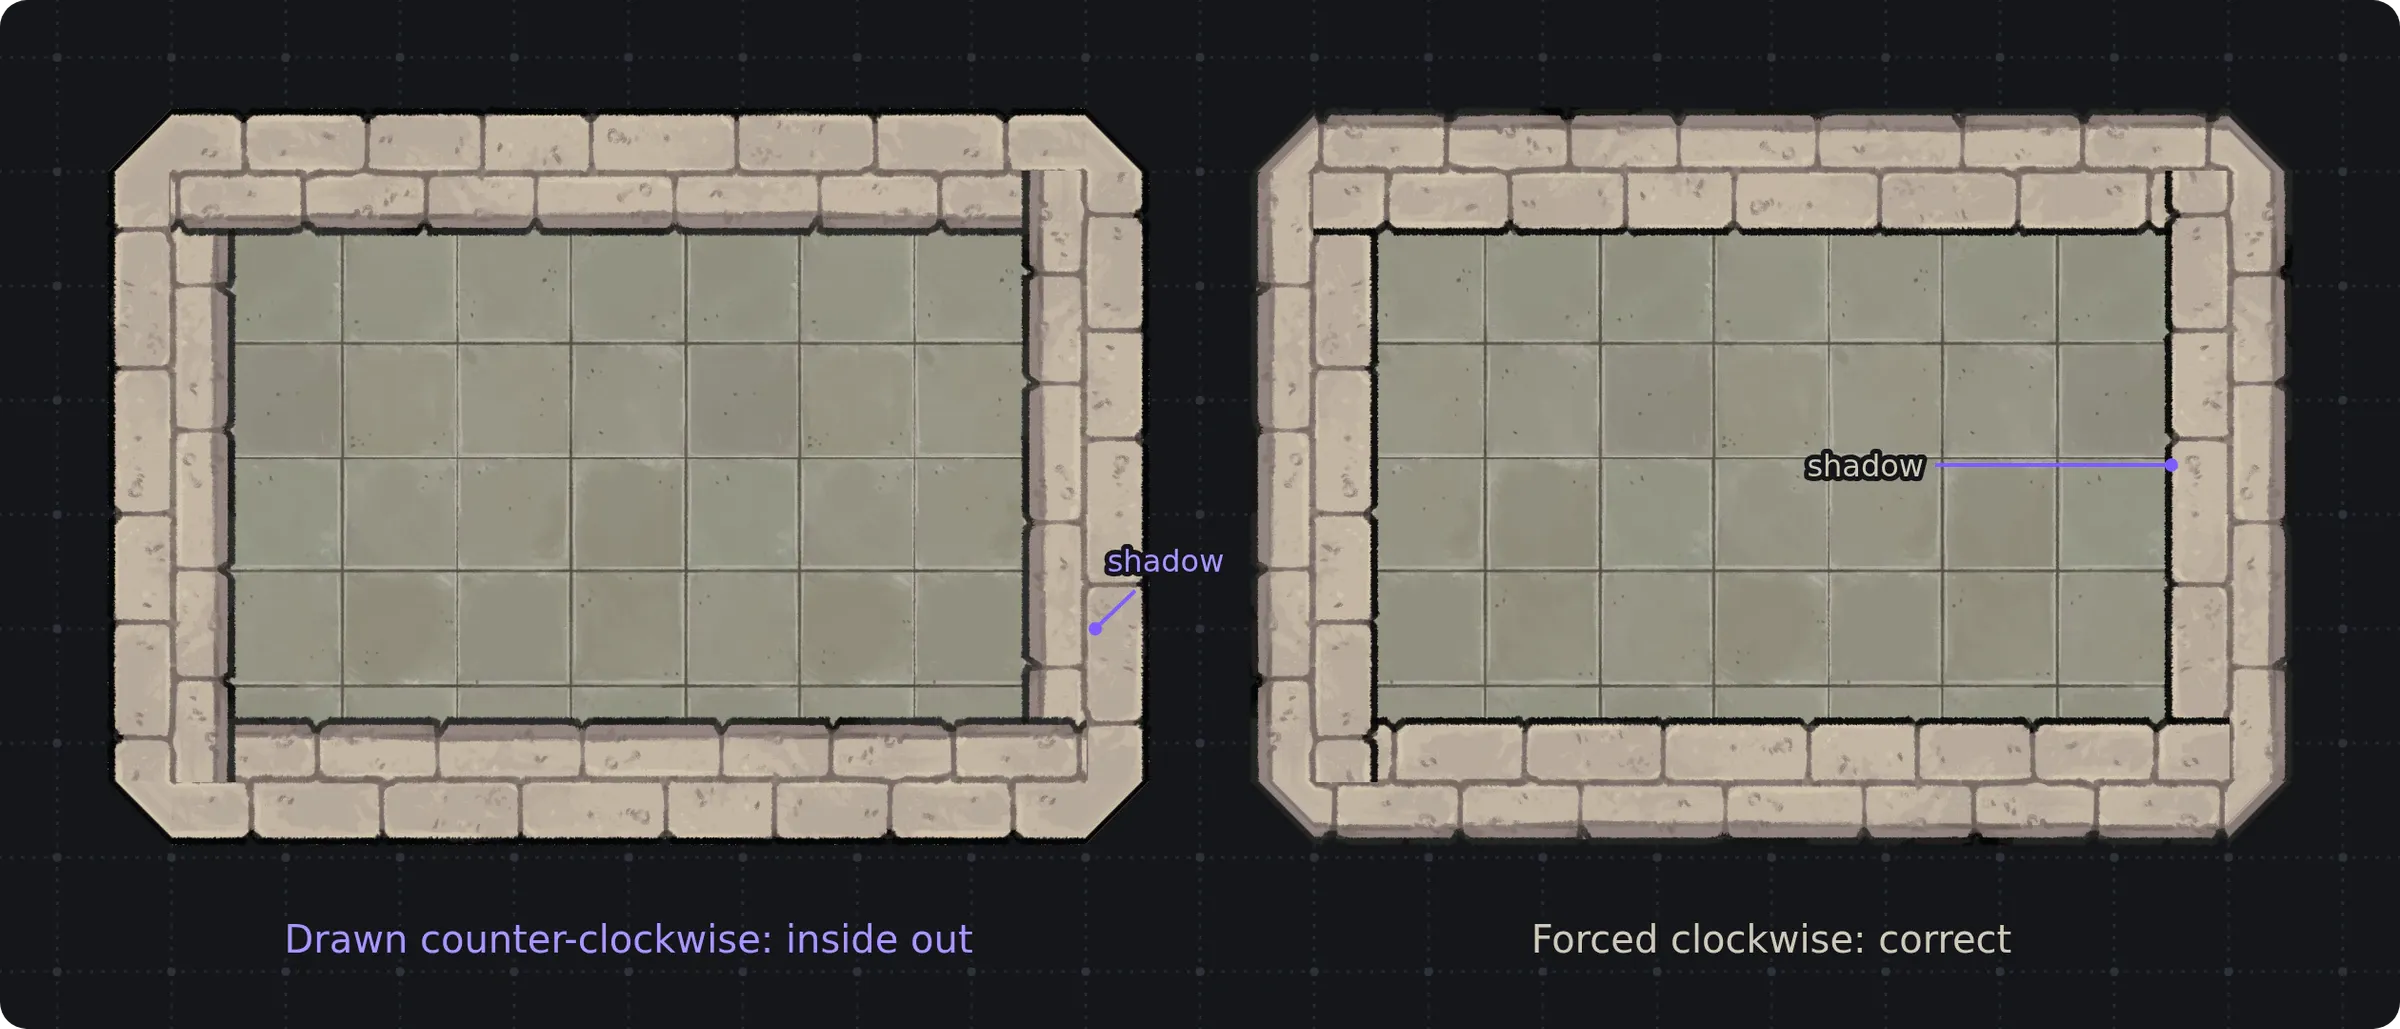
Again, not something you would notice on most stroke textures, but that got really obvious on surface borders and more natural looking paths.
Bug #2: Noodle bricks
A Stroke texture is a long strip. The one I was testing with is 1024 pixels long and 124 tall.
When you make a wall 32 pixels thick, the texture has to shrink to fit. Which it did… In one direction. :/
The height squished down to 32, the length stayed at 1024, and every brick in the wall turned pasta-shaped.
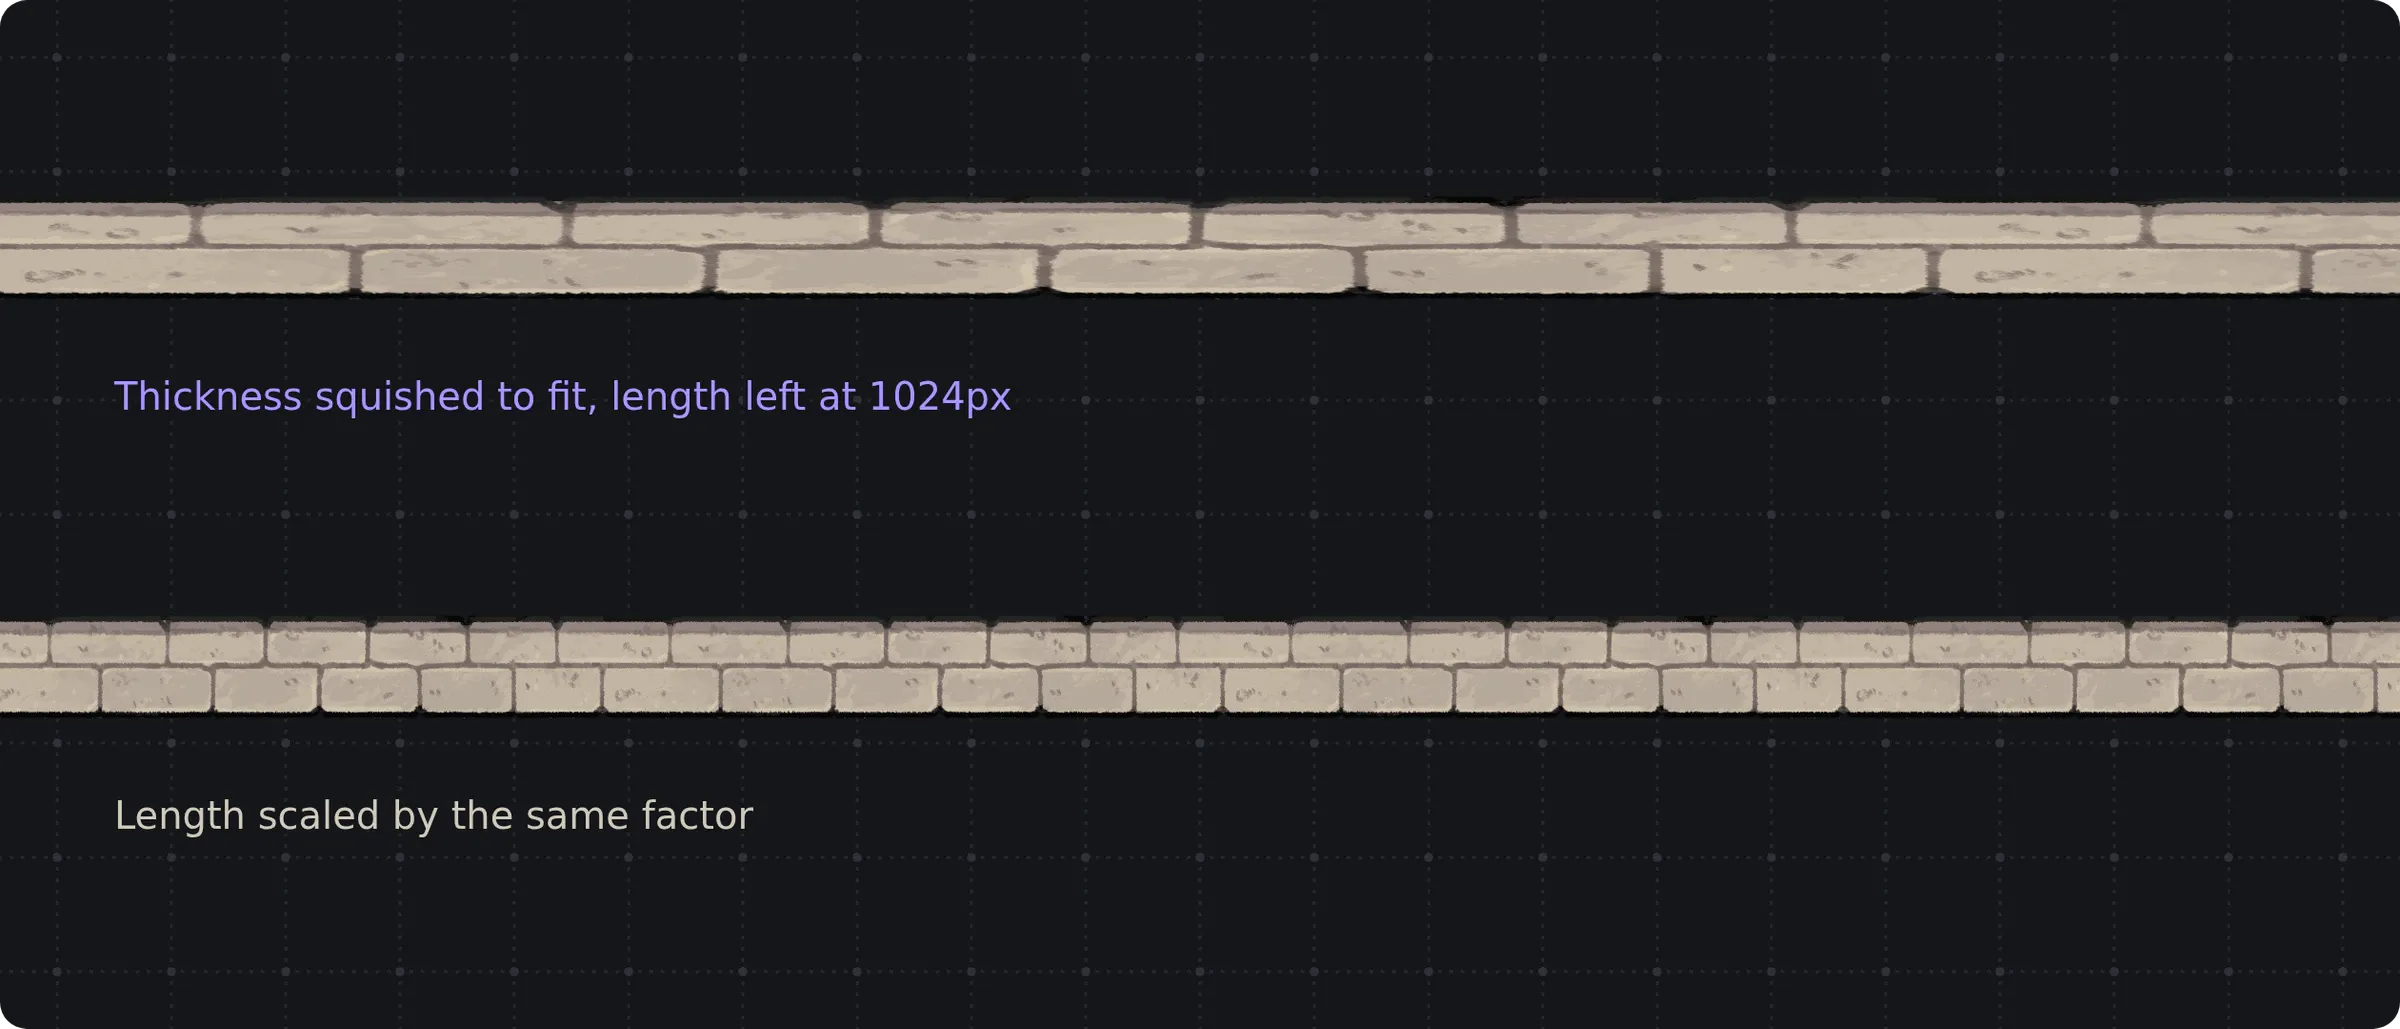
The fix is to shrink the length by the same amount as the thickness. Squish it 4x tall, squish it 4x long. Bricks stay brick-shaped no matter how thick the wall is.
const worldUnitsPerRepeat = textureLength * (worldWidth / textureThickness);One line. Again.
Anyone counting lines of code as “productivity” really has no idea what they’re talking about. That one line took longer than I care to admit to solve. :/
Before and After
Same room. Same assets. Same walls.
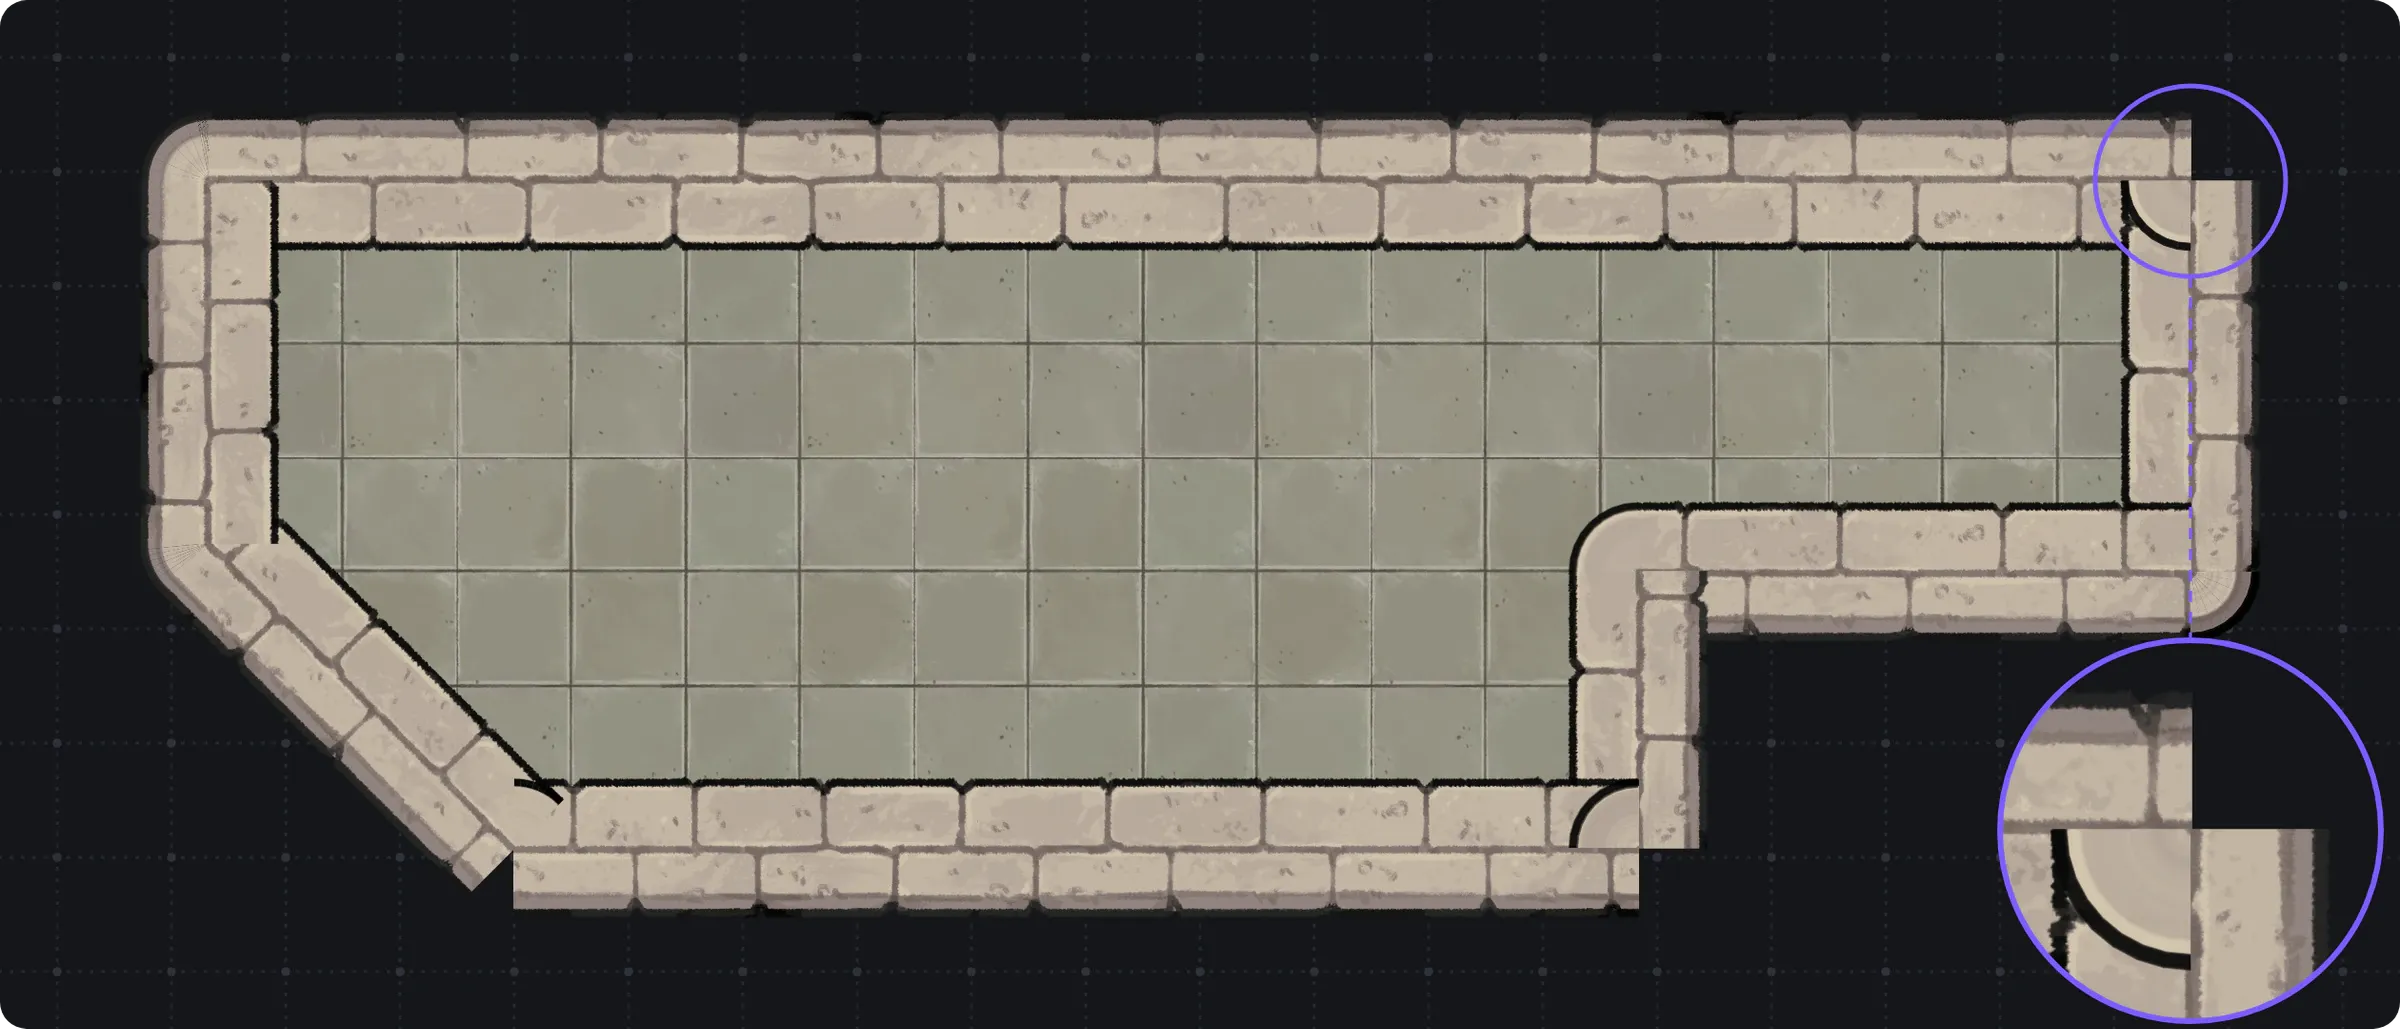
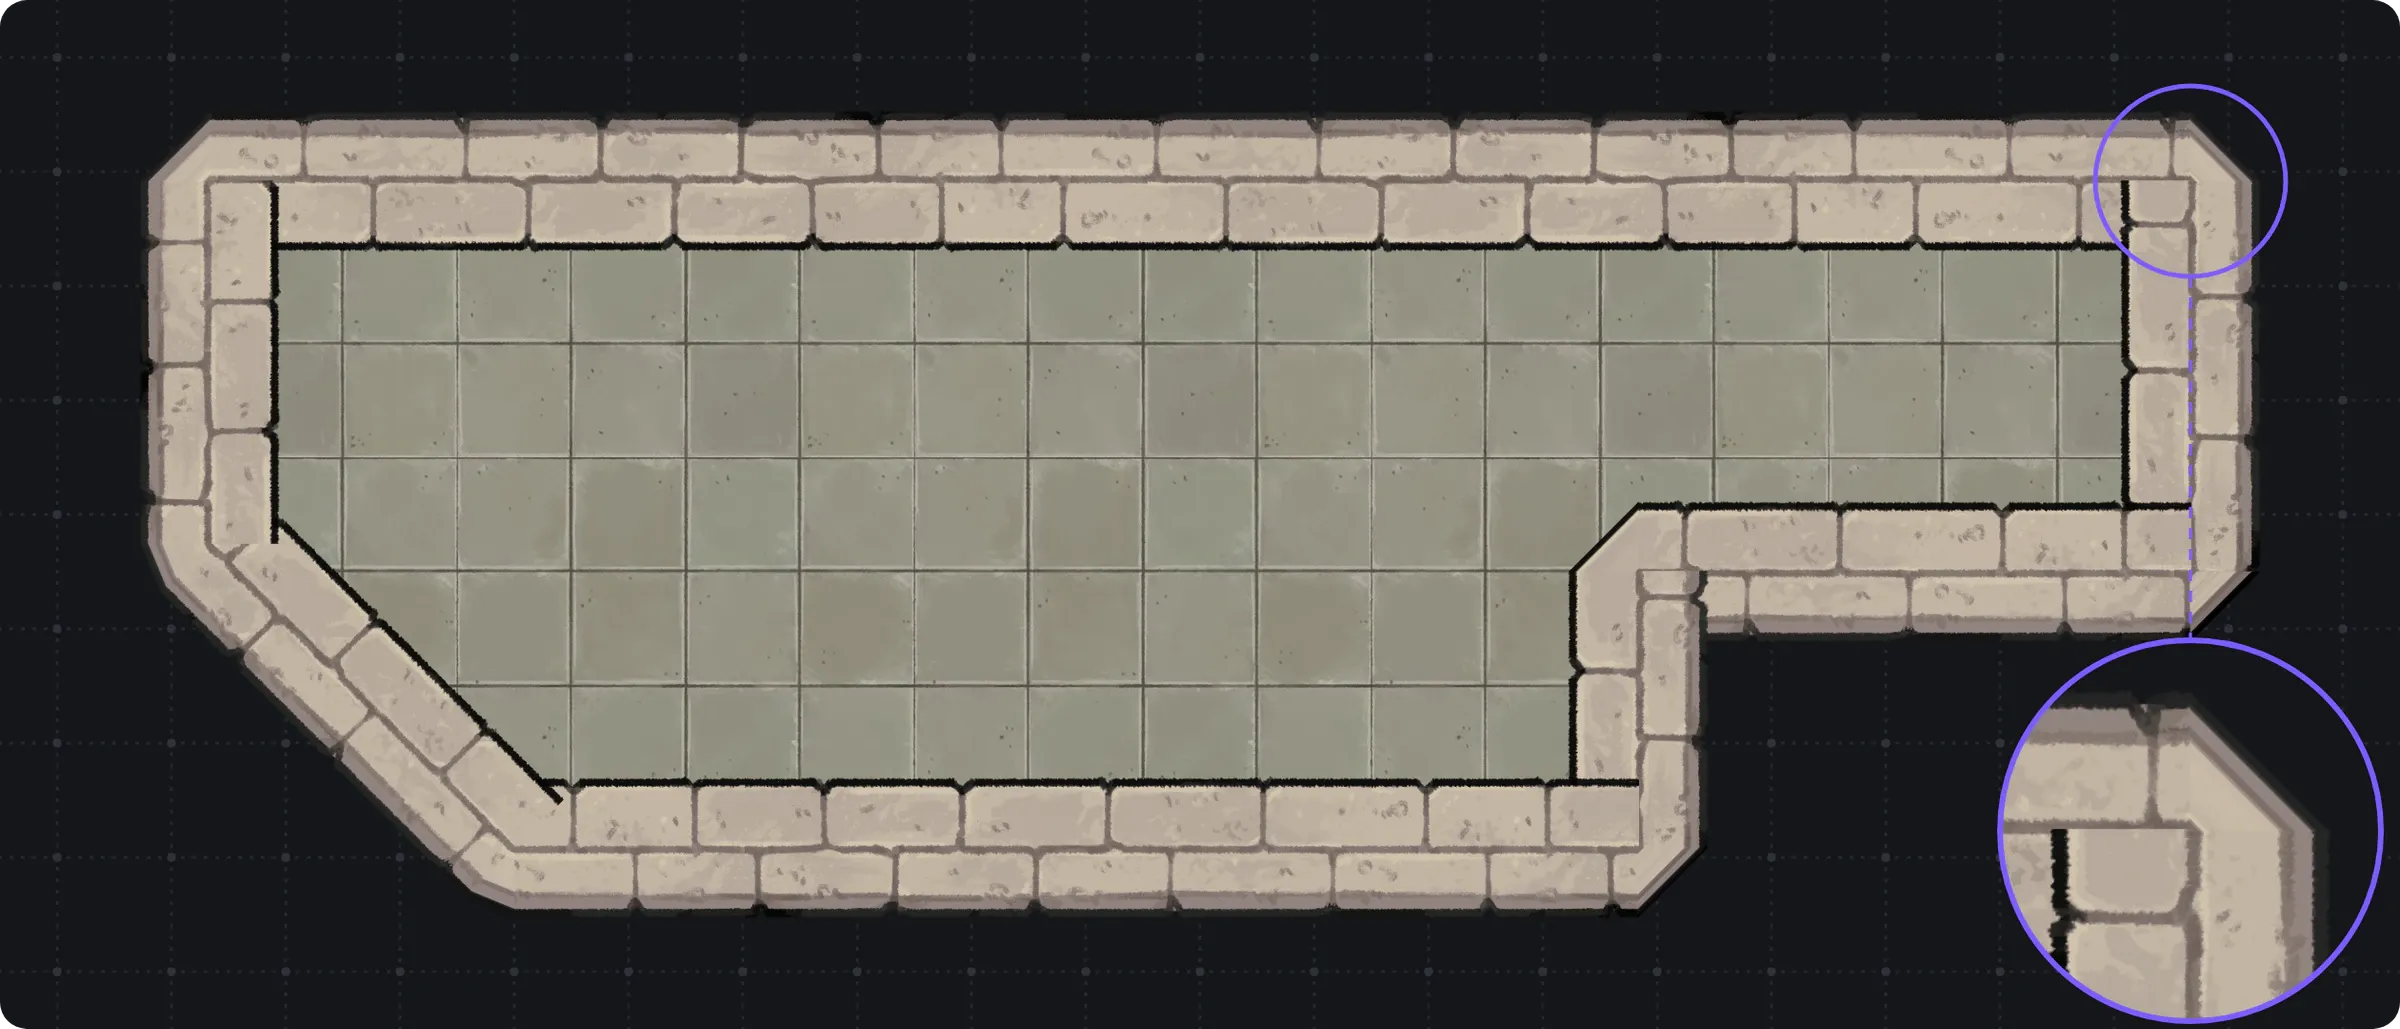
The only thing that changed is what happens at the corners.
The Takeaway
Battlemaps are like, 80% edges. There are a LOT of edges. Walls of rooms, caves, where the water meets the shore, acid pits, and ESPECIALLY dungeons.
If the corners look bad, then everything looks bad. So even though this took way way WAY more time than I wanted it to, it was definitely an investment well made.
Taggedrenderingstrokesgeometry